Tor’s Bridge, if widely disseminated, may get blocked within a few days, so frequently changing it can be a hassle (this reminds me of the days when I modified the hosts file to access Google). Today, I tinkered a bit and built a Tor Bridge on my VPS for personal use. Additionally, I extracted tor from the Tor Browser so that it doesn’t rely on the Tor Browser and can be used with other browsers.
Warning: Deploying a Bridge may increase the probability of the server being blocked.
Setting Up a Tor Bridge
First, install tor on the VPS:
1 | $ apt-get install tor |
Then install obfs4proxy:
1 | $ apt-get install obfs4proxy |
Since tor needs to use obfs to obfuscate the traffic, if you cannot find the package in your software repository, you can also compile from source: Yawning/obfs4.
1 | # Compile obfs4proxy from source |
Note: If you encounter errors like
can't downloadwhile downloading the dependency packagesgo get -d ..., you can clone the indicated package from the suggested repository and place it in the path given in the error message.
The Tor-related libraries can be found at gitweb.torproject.org.
If both tor and obfs4 have been installed successfully, edit the Tor configuration file /etc/tor/torrc:
1 | $ sudo nano /etc/tor/torrc |
Fill in the following configuration:
1 | Log notice file /var/log/tor/notices.log |
Note: Change the path of ServerTransportPlugin to where you compiled the obfs4proxy.
Then execute the command to restart tor:
1 | $ systemctl restart tor |
After executing, check the tor log file /var/log/tor/notices.log:
1 | $ cat /var/log/tor/notices.log |
You will see output similar to the following: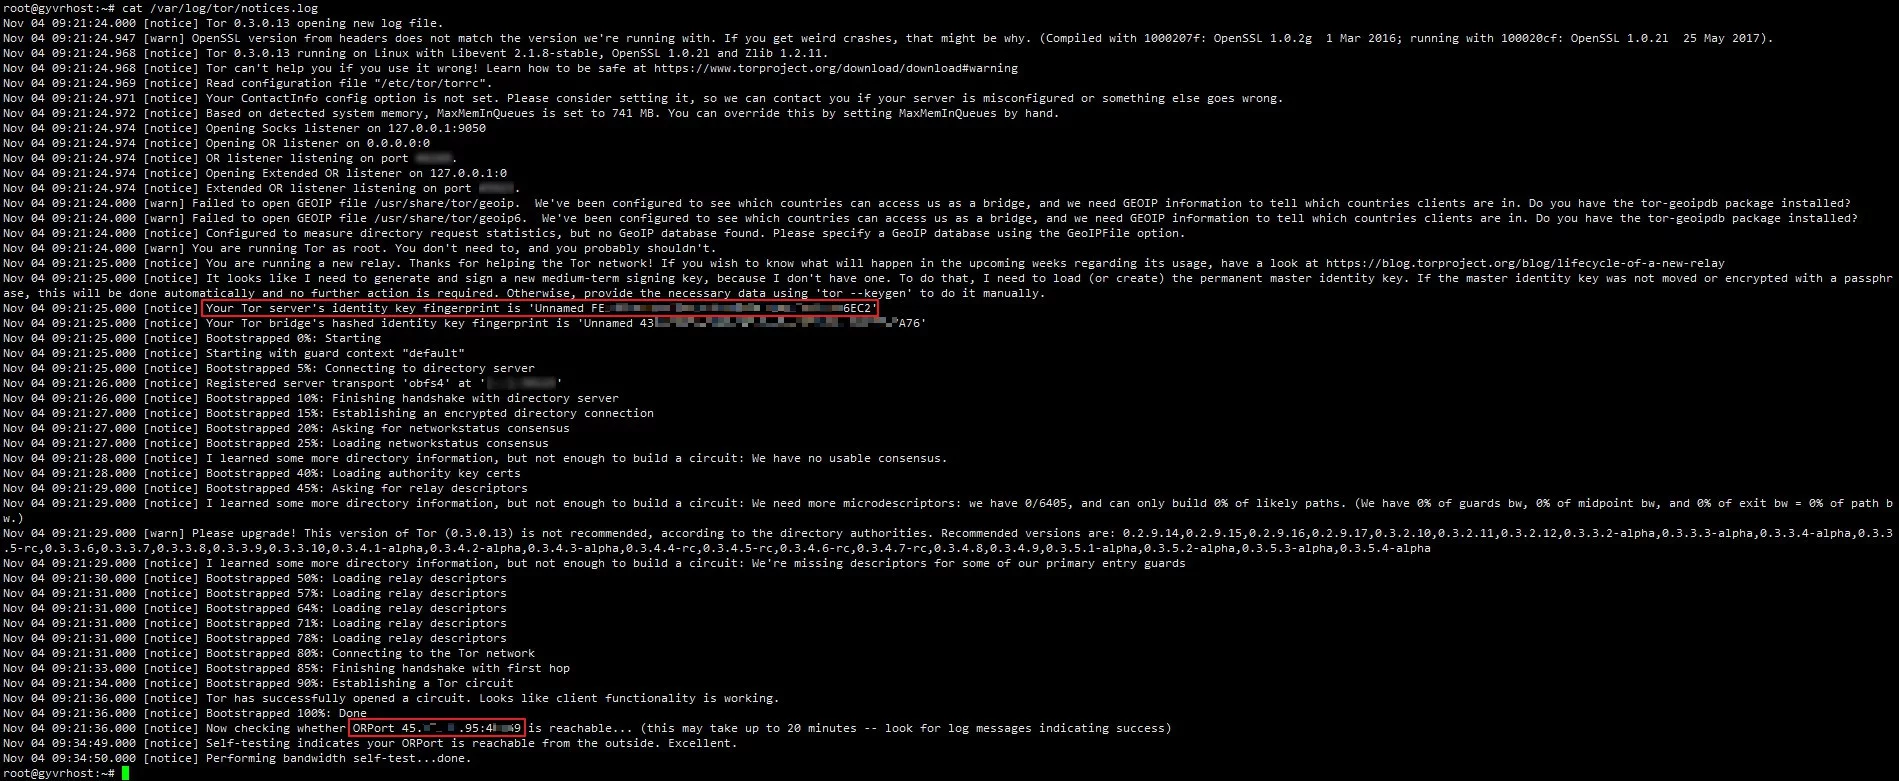
Indicating that the Tor Bridge has been successfully set up. Record the parts in the red box:
1 | ORPort 45.XXX.XXX.95:4XXX9 |
These two are the bridge data required when connecting from the client:
1 | 45.XXX.XXX.95:4XXX9 FE3XXXXXXXXXXXXXXXXXXXXXXC16DCF |
Next, when using the Tor Browser, you can input your own bridge.
Extracting tor from Tor Browser
First, download the Tor Browser installation package and install it (in any directory).
Then open the installation path of the Tor Browser and copy out Tor Browser\Browser\TorBrowser\Tor to a new directory, such as tor_portable.
At this point, the directory structure of tor_portable is as follows:
1 | C:\USERS\VISIONSMILE\DESKTOP\TOR_PORTABLE |
Then create a new Data folder under tor_portable for later use.
Next, open the installation directory of Tor Browser, find the path Tor Browser\Browser\TorBrowser\Data\Tor, and copy the geoip and geoip6 files from that directory to the tor_portable\Data directory created in the previous step.
At the same time, also copy the torrc file from Tor Browser\Browser\TorBrowser\Data\Tor to the tor_portable directory.
After completing the above operations, the directory structure of tor_portable is as follows:
1 | C:\USERS\VISIONSMILE\DESKTOP\TOR_PORTABLE |
Next, open tor_portable\torrc with a text editor and fill in the following configuration:
1 | Bridge 45.XXX.XXX.95:4XXX9 FE3XXXXXXXXXXXXXXXXXXXXXXC16DCF |
Bridge is the bridge; you can use the parameters deployed on the server above.
Note: Do not add obfs4 after Bridge. During testing, it was found that using this format:
1 | Bridge obfs4 45.XXX.XXX.95:4XXX9 FE3XXXXXXXXXXXXXXXXXXXXXXC16DCF |
will produce an error:
1 | Nov 04 19:22:57.000 [warn] Proxy Client: unable to connect to 45.XXX.XXX.95:4XXX9 ("general SOCKS server failure") |
Additionally, pay attention to Socks5Proxy, which should be determined based on your configuration and needs.
After executing the above operations, the extraction and configuration of Tor are complete.
You can now start Tor locally:
1 | # Execute in the tor_portable directory |
At this point, a tor.log file will be created in the tor_portable directory, which you can open to view the Tor log.
When the log shows output like the following, it means the connection is successful:
1 | Nov 04 19:20:39.000 [notice] Bootstrapped 50%: Loading relay descriptors for internal paths |
After starting Tor, a Socks5 proxy (127.0.0.1:9050) will be created, which you can use to set up the extension Proxy SwitchyOmega on Chrome. If you can’t access the Chrome Web Store, you can download it from GitHub: FelisCatus/SwitchyOmega.
After completing these settings, you can now access some “dark web” websites!
For example, DuckDuckGo’s dark web URL: https://3g2upl4pq6kufc4m.onion
Or the Imperial Library that shares books: http://xfmro77i3lixucja.onion
Quick Start/Stop Tor Batch File
The command used to start Tor is tor -f torrc, which can be written as a batch file:
1 | rem tor-run.bat |
Next is the batch file to stop Tor. Since Tor will start obfs4proxy to obfuscate the traffic, it will simultaneously start processes for both tor and obfs4proxy. When stopping, we need to kill these processes. In Windows, you can use the taskkill /IM command:
1 | rem tor-stop.bat |
The article concludes here. At this point, the complete directory structure of tor_portable is as follows:
1 | C:\USERS\VISIONSMILE\DESKTOP\TOR_PORTABLE |
- 2018.11.05 10:29 update: Modified part of the wording and typos.