UE access to SteamSDK and related information

UE接入SteamSDK及相关资料

To launch a game on Steam, it is necessary to integrate the SteamSDK. This article briefly introduces the method of integrating SteamSDK in UE4, with future content related to integrating Steam platform services also included in this article.

The integration of SteamSDK allows the game to connect with the Steam community, which has a robust community ecosystem that Epic’s newly launched Epic Games Store cannot currently compete with~(of course, I support market competition).

Without further ado, first check the engine directory:

1
Engine\Binaries\ThirdParty\Steamworks\Steamv139

See if there are Win32/Win64 folders and whether the following files are present within them:

1
steam_api.dll  steamclient.dll  tier0_s.dll  vstdlib_s.dll

If not, you can copy them from the Steam installation directory.

Then open the project, go to Plugins - Online Platform, and ensure that the following three plugins are enabled:

  • Online Subsystem NULL
  • Online Subsystem Steam
  • Online Subsystem Utils

Open the project’s *.target.cs file and add bUsesSteam = true;:

1
2
3
4
5
6
7
8
9
10
11
12
using UnrealBuildTool;
using System.Collections.Generic;

public class SanguoWarriorsTarget : TargetRules
{
public SanguoWarriorsTarget(TargetInfo Target) : base(Target)
{
Type = TargetType.Game;
bUsesSteam = true;
ExtraModuleNames.AddRange( new string[] { "SanguoWarriors" } );
}
}

Open the project’s *.build.cs, and add additional module dependencies for OnlineSubsystem:

1
2
3
4
5
6
7
8
9
10
11
PublicDependencyModuleNames.AddRange(
new string[] {
"OnlineSubsystem",
"OnlineSubsystemUtils",
});

PrivateDependencyModuleNames.AddRange(
new string[] {
"OnlineSubsystem",
"OnlineSubsystemUtils"
});

Open the Config/DefaultEngine.ini file in the project directory and add (or edit) the following content:

1
2
3
4
5
6
7
8
9
10
11
12
13
[/Script/Engine.Engine]
!NetDriverDefinitions=ClearArray
+NetDriverDefinitions=(DefName="GameNetDriver",DriverClassName="/Script/OnlineSubsystemSteam.SteamNetDriver",DriverClassNameFallback="/Script/OnlineSubsystemUtils.IpNetDriver")

[OnlineSubsystem]
DefaultPlatformService=Steam
PollingIntervalInMs=20

[OnlineSubsystemSteam]
bEnabled=true
SteamDevAppId=480
GameServerQueryPort=27015
bRelaunchInSteam=false

Make sure to change the SteamDevAppId to your own Steam content’s AppID.

Once the above operations are complete, open Steam (you must start Steam to use Shift+Tab in the game) to bring up the Steam interface.

Then you can run the game in Standalone mode, and after entering the game, press Shift+Tab. If the Steam interface can be brought up, it is successful.
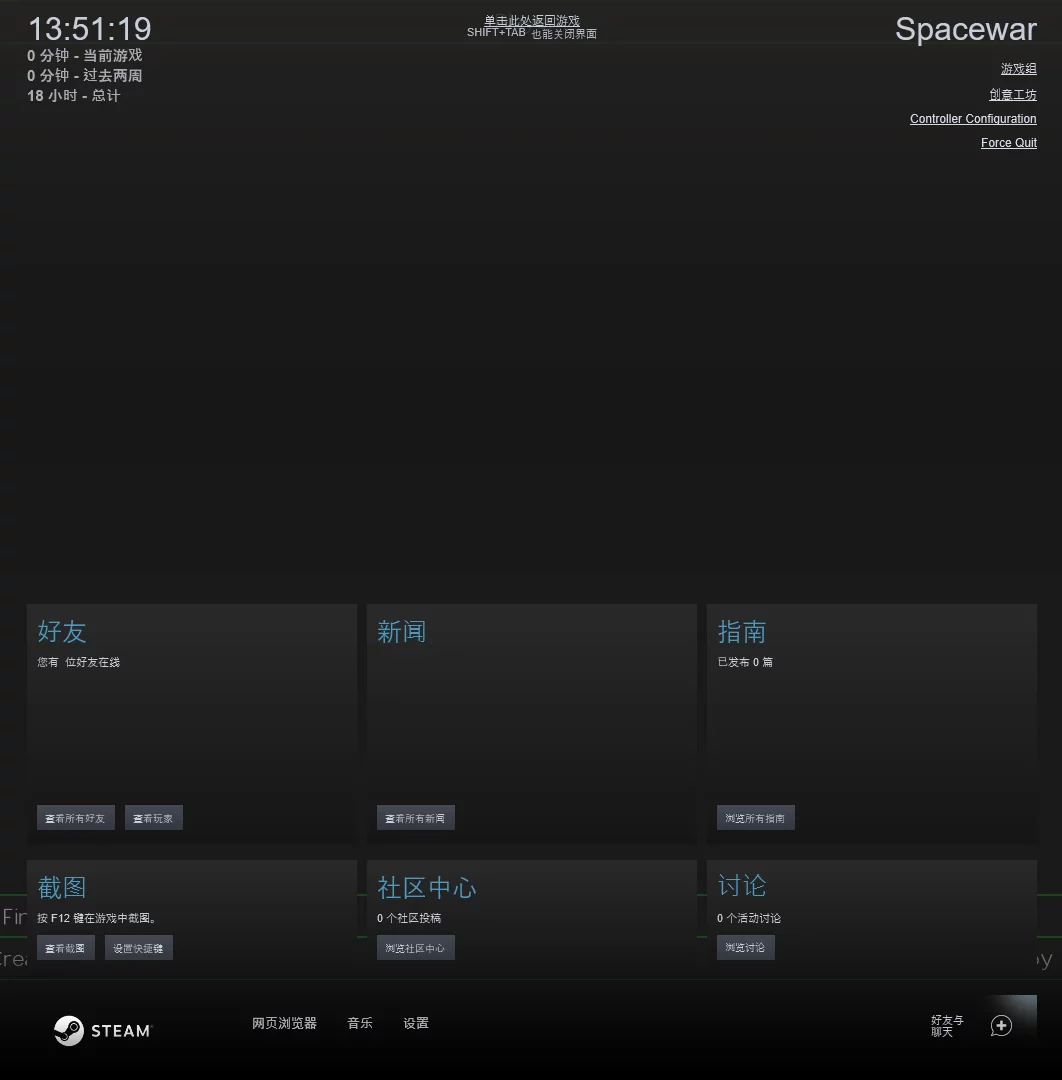
If you see warnings like this in the logs:

1
2
3
4
5
6
7
8
9
10
11
12
[2019.03.18-06.02.22:971][186]LogOnline: Warning: STEAM: Steamworks: SteamUtils() failed!
[2019.03.18-06.02.22:971][186]LogOnline: Warning: STEAM: Steamworks: SteamUser() failed!
[2019.03.18-06.02.22:972][186]LogOnline: Warning: STEAM: Steamworks: SteamFriends() failed!
[2019.03.18-06.02.22:972][186]LogOnline: Warning: STEAM: Steamworks: SteamRemoteStorage() failed!
[2019.03.18-06.02.22:973][186]LogOnline: Warning: STEAM: Steamworks: SteamUserStats() failed!
[2019.03.18-06.02.22:973][186]LogOnline: Warning: STEAM: Steamworks: SteamMatchmakingServers() failed!
[2019.03.18-06.02.22:973][186]LogOnline: Warning: STEAM: Steamworks: SteamApps() failed!
[2019.03.18-06.02.22:973][186]LogOnline: Warning: STEAM: Steamworks: SteamNetworking() failed!
[2019.03.18-06.02.22:974][186]LogOnline: Warning: STEAM: Steamworks: SteamMatchmaking() failed!
[2019.03.18-06.02.22:974][186]LogOnline: Display: STEAM: OnlineSubsystemSteam::Shutdown()
[2019.03.18-06.02.22:975][186]LogOnline: Warning: STEAM: Steam API failed to initialize!
[2019.03.18-06.02.22:975][186]LogOnline: Display: STEAM: OnlineSubsystemSteam::Shutdown()

This is because Steam was not opened when the game started. Just start Steam before running the game.

Things to note for packaging:
When packaging using Shipping mode, after packaging is complete, create a file named steam_appid.txt in the output directory $ProjectName\Binaries\Win64 and fill in your AppID (such as 480 for the Steam test AppID).

External Resources

未完待续。

Scan the QR code on WeChat and follow me.

Title:UE access to SteamSDK and related information
Author:LIPENGZHA
Publish Date:2019/05/27 23:02
Word Count:1.6k Words
Link:https://en.imzlp.com/posts/3231/
License: CC BY-NC-SA 4.0
Reprinting of the full article is prohibited.
Your donation will encourage me to keep creating!