This blog has switched to Github Action for automated deployment.
Using Hexo to generate a static blog and then deploying it to Github/Coding Pages is currently how my blog is hosted. It’s quite enjoyable to use, but there are several issues:
- The environment configuration for Hexo is too cumbersome; it’s almost impossible to update the blog when changing to a new computer.
- Each time I modify an article, I have to regenerate everything.
- Additionally, the number of command executions for submitting the blog source files is too high (mainly the first step).
I wasted a lot of time submitting articles, so I optimized the process to almost achieve fully automated submissions.
According to the steps above, even if the deployment environment is already set up, the most basic modification/synchronization of an article still involves the following steps:
1 | Modify the article |
If there are errors in the written article, after correcting them, I have to start over with the above steps, wasting a lot of time. Fortunately, I recently discovered a Continuous Integration deployment method that I think can also be applied to my blog to simplify these steps as much as possible.
The main concept is: when I push new files (code) to the Github repository, a series of actions are triggered. We can set a series of commands to automatically execute hexo d -g when we add/modify .md articles to generate and deploy to the Github/Coding Pages repository.
For Continuous Integration, I chose Travis CI because it seamlessly integrates with Github and offers free access to public repositories. Additionally, since Travis CI can only import repositories from Github and currently coding.net does not support Tokens, we can’t push directly to the coding.net repository on Travis, which requires some tweaking with private keys, but that is not discussed for now.
First, you need to have a successfully deployed hexo repository, for example:
1 | git@github.com:imzlp/blog-source.git,gh-pages |
And your blog source files are in:
1 | git@github.com:imzlp/blog-source.git,master |
First, open Travis CI and log in using your Github account.
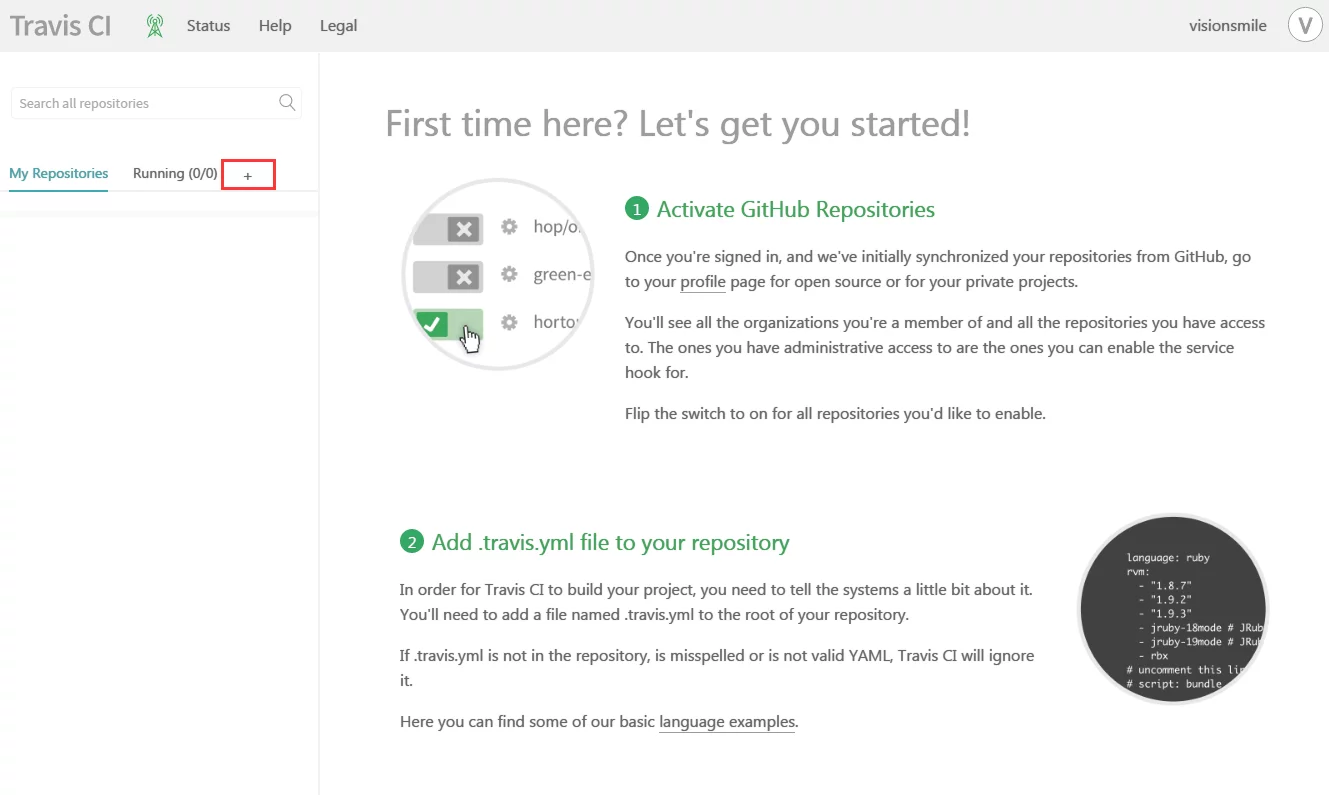
Click on the + sign in the red box and select the repository where your blog is located.
If it does not show up, click the “Sync account” button in the upper right corner to synchronize it.

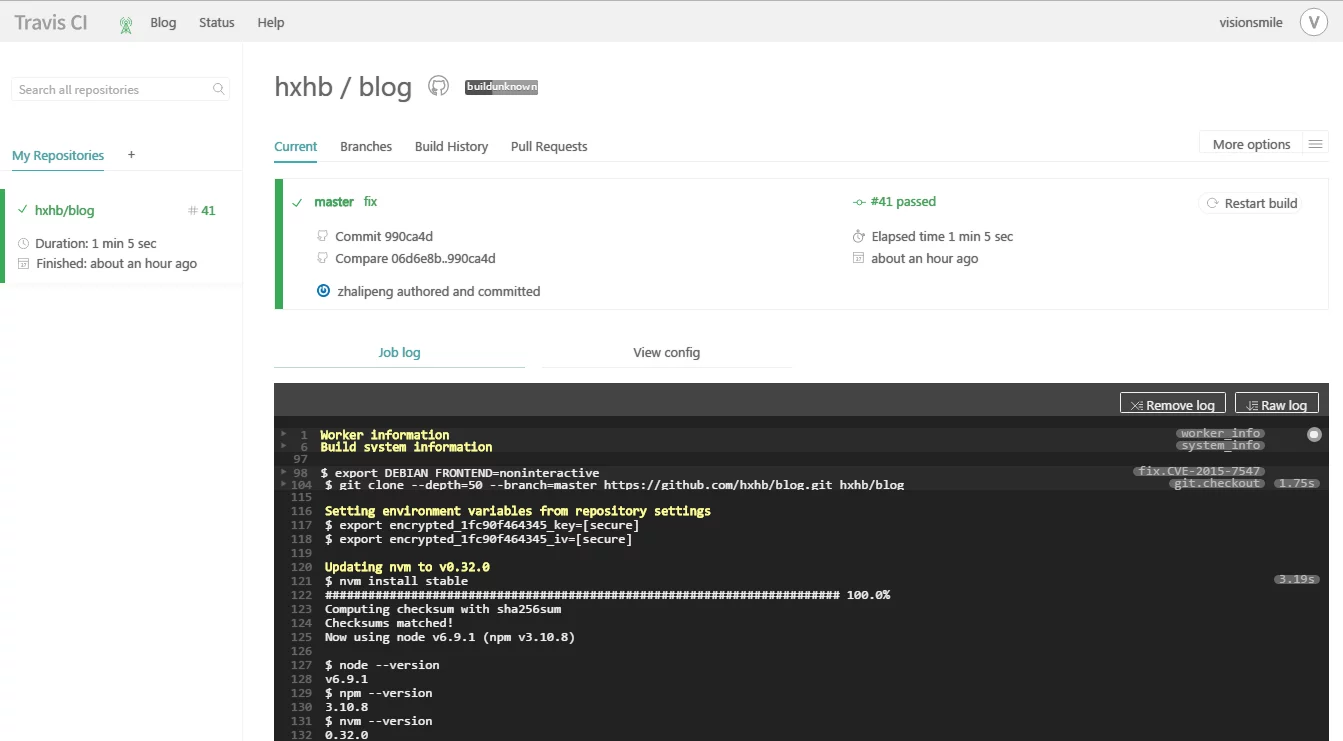
Then return to the main interface, and you will see your selected repository in the list.
Since I have deployed successfully before, it will display a green checkmark.
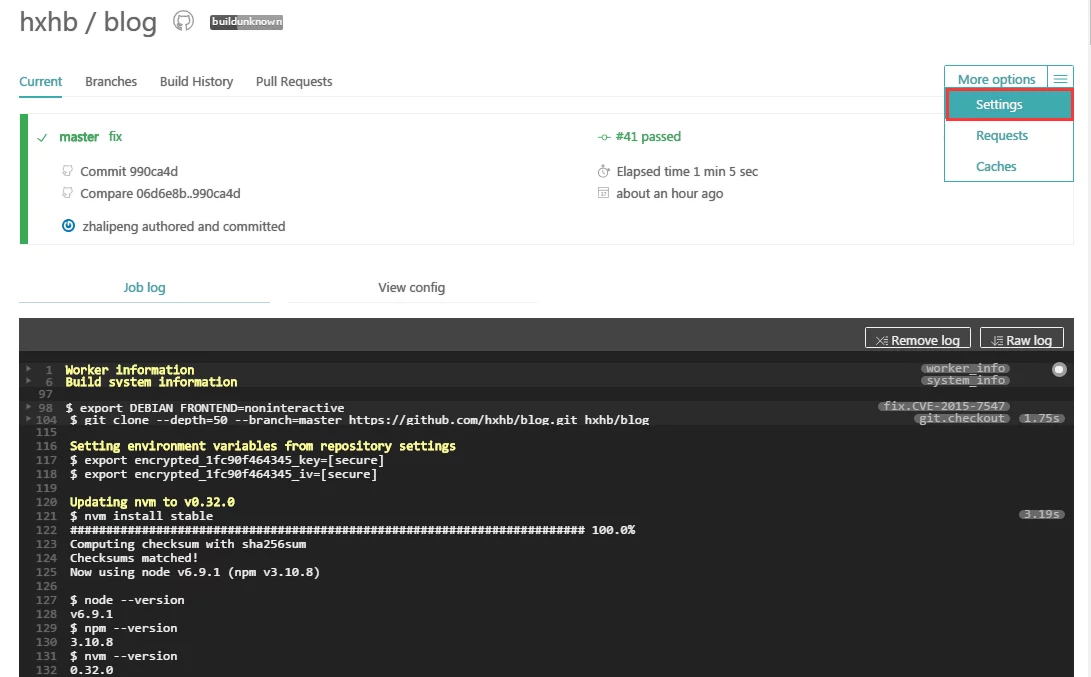
Open the settings and enable Build only if .travis.yml is present and Build pushes.
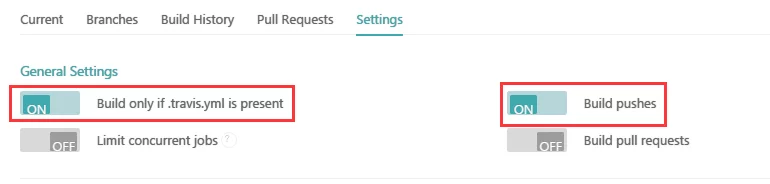
The meanings of these two options are:
- Build only if .travis.yml is present: Only build if the branch configured in .travis.yml has changed.
- Build pushes: Start building after pushing to this branch.
The basic idea is to create a .travis.yml file in the directory where the blog source code is located and write your configuration file there. Once you push to this branch, Travis CI will detect the changes in the repository and execute the commands configured in the .travis.yml file.
However, there is a problem; pushing to Github or Coding requires an SSH private key, but we cannot put the key created in Travis CI into the Github/Coding ssh-key. Currently, Github supports token-key, which allows for pushes without an ssh-key, but if you want to deploy your blog to different service providers’ repositories (Github Pages/Coding Pages), this is not a universal solution.
So my idea is that since a private key is to be generated anyway, I can directly upload the SSH private key from my VPS to Travis CI, allowing smooth deployment (the public key on the VPS has already been added to the Github/Coding ssh-key), but then there’s the issue of security…
Fortunately, I found that I could encrypt the private key before pushing it to the blog source repository. Then, after cloning the repository in Travis CI, I can decrypt the file of the encrypted private key, execute hexo d -g, and finally delete the private key, which solves part of the security issue (the private key pushed to the blog source files is encrypted, ensuring security even in a public repository, the only security vulnerability is that you need to ensure that your Travis (Github) account is secure…).
First, install the Ruby environment on your VPS (Linux environment) where you can deploy hexo (choose according to your environment):
1 | # For Debian and other distributions using Debian style packaging the ruby development headers are installed by: |
Then install the gem and travis client:
1 | # install gem |
After installation, log in to Travis with the following command:
1 | # travis-ci.org |
Note: If using travis-ci.com, then you need to use the command
travis login --pro.
You will be prompted to enter your username and password; here you should use your Github account.
Once logged in, we can encrypt our private key and place it into the blog source repository for later decryption during deployment by Travis CI.
1 | # Encrypt the private key id_rsa; pay attention to specify your private key location, and also specify the repository -r ${Repo_Name} |
At this point, you will see two environment variables created in the settings of the imzlp/blog-source repository in travis-ci: $encrypted_1fc90f464345_key and $encrypted_1fc90f464345_iv. The contents defined by these two environment variables are not visible to others, ensuring the safety of our private key, which will be used to decrypt it.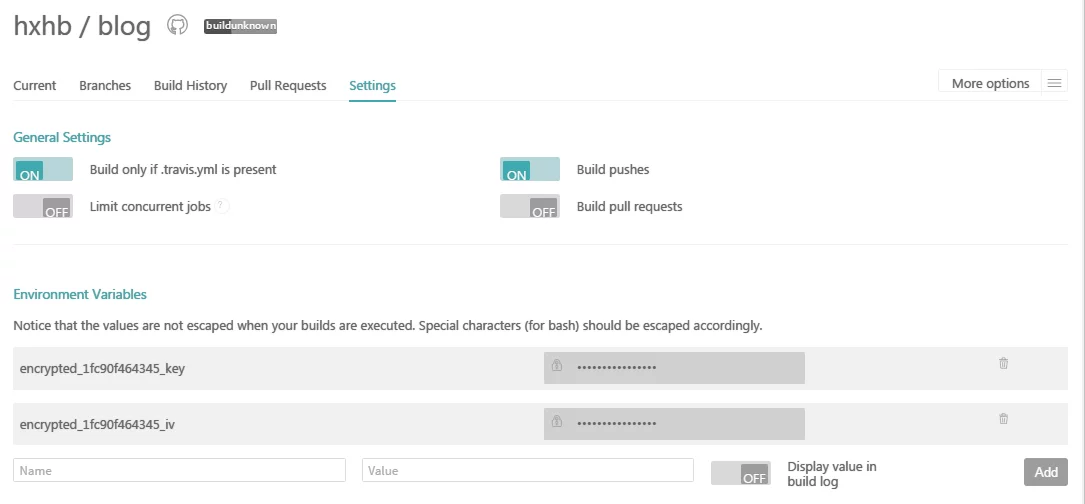
Then, the current directory will generate two files: .travis.yml and id_rsa.enc. The id_rsa.enc is the file obtained after encrypting our private key, and in .travis.yml we will add commands to decrypt id_rsa.enc, in a format like this (note that everyone’s will be different, do not directly copy my code):
1 | - openssl aes-256-cbc -K $encrypted_1fc90f464345_key -iv $encrypted_1fc90f464345_iv |
This command uses openssl and the two environment variables defined above to decrypt the private key and store the decrypted private key in ~/.ssh/id_rsa.
Next, we need to add a command in .travis.yml to set the permission of the private key, making it readable:
1 | - chmod 600 ~/.ssh/id_rsa |
Then add this private key to the system:
1 | - eval $(ssh-agent) |
Subsequently, move id_rsa.enc to .travis:
1 | mv id_rsa.enc .travis |
When we connect to a remote host via SSH, it will check the host’s public key. If it’s the first time connecting to that host, it will display a fingerprint of the host’s public key, prompting users to trust the host, but during continuous integration with Travis, we can’t input yes… Hence, if you directly push, it will hang here. The solution is to disable public key checking for remote hosts in SSH.
Create a new file named ssh_config in .travis and fill in the following content:
1 | Host * |
This means that public key checking for all hosts is disabled, and the private key address is specified as ~/.ssh/id_rsa.
In Travis, I will overwrite the default ssh_config from Travis (/etc/ssh/ssh_config).
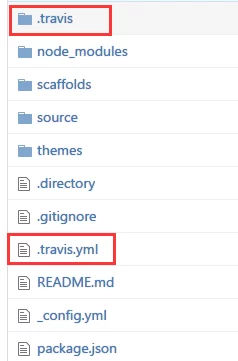
Next, move both .travis and .travis.yml to the blog source files, with the following directory structure:
1 | .deploy_git |
Open .travis.yml and fill in the content from the code block below, ensuring you modify the decryption code with your own parameters.
Note: Do not set the node_js version to stable, as the recent update to nodejs 7.0 is not compatible with some hexo plugins. It’s best not to write stable; since Travis uses nvm to manage node versions, we can directly specify the version number. To prevent unnecessary issues, I recommend setting it to 5.9.1.
1 | language: node_js |
As can be seen, it’s akin to a bash command that can be executed on a Linux host. The install part is executed first, followed by the before_install part, and finally the script part. Essentially, it sets up an environment on travis-ci for deploying the blog to GithubPages/CodingPages and performs the hexo d -g operation.
You can then push the blog source files to the Github repository (note that this is the blog source files, not the files in the public folder generated by hexo g).
1 | $ git add . |
After pushing, log in to the Travis CI page and see if it is deploying in the background.
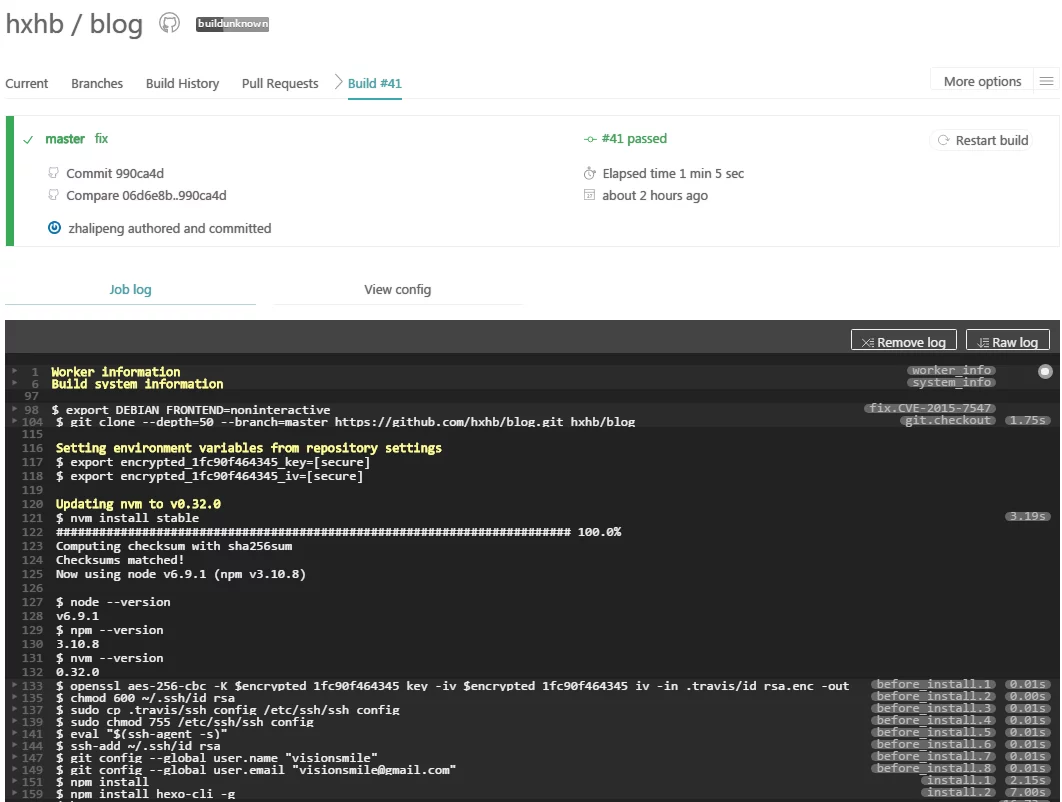
Once the deployment is successful, check your Github Pages repository to see if the submission was successful or wait for your blog page to refresh. If Travis CI reports an error, please carefully verify the steps above.
In my _config.yml, I’ve written two repositories; during hexo d, it will push to these two repositories (originally, Travis CI only supports Github repositories).
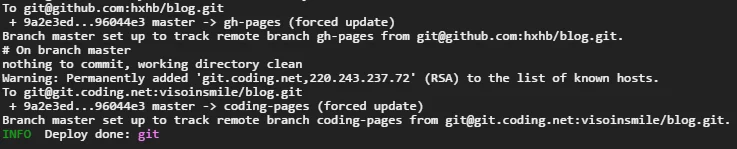
Now, updating the blog articles only requires pushing .md articles to the blog source repository (branch), and Travis CI will detect the update and Continuous Integration will automatically deploy the updates to our blog.
Possible Problems
The most common issues encountered are still related to the private key/public key checks during deployment. Remember that after replacing the ssh_config in Travis CI, you must set permissions (I set it to 755 above), otherwise it will still check the public key when pushing.
Don’t forget to set the global git variables for user and email before executing hexo d -g, otherwise hexo d will prompt you with “who are you?”.
1 | - git config --global user.name "userName" |
You can refer to the repository directory and configuration files from my blog source repository (master branch). The Travis CI configuration mainly relies on the files in the .travis directory and the .travis.yml file.
Postscript
Currently, my blog deployment method has become very convenient, and no longer requires manual generation and pushing.
I’ve used Dropbox to synchronize the blog source files and deployed them simultaneously on my VPS and my computer. This way, whenever I modify or add articles locally, they will instantly sync to my VPS. I also wrote a shell script and added it to the .bashrc as an alias. Using Xshell, JuiceSSH (for Android), or the plink in Putty, I can log into my VPS with a single command, and with just one command, it will automatically push the updates to my Github! (Using Xshell’s quick command set or a script for automatic command execution doesn’t require typing anything; just a click will execute it), while Travis CI constantly monitors my blog repository, generating and pushing updates to the gh-pages branch as soon as it detects submissions.
Now the steps are just:
- Add/modify articles (local modifications are immediately synced to VPS through Dropbox).
- Execute the automatic submission script (start
plinkto quickly connect to VPS and execute the command script).
It’s also possible to write a program to run on the VPS that automatically detects changes in the article directory and executes quick submission commands. This way, it could be entirely automated. But doing so would result in a commit pollution every time you modify a single character, so perhaps I will implement such a solution when I am too lazy in the future…
Postscript: Using plink can automatically log into the VPS and execute commands, achieving a truly password-less experience. The current quick submission script is as follows:
1 | # save to ~/blog |
Then, using the following syntax will automatically connect to the VPS and quickly submit:
1 | plink -pw ${server-username-password} ${username@Host} -P ${portNum} "${order}" |
Plink can also use keys for login, but plink requires ppk keys generated by puttygen, so we need to open the SSH private key with puttygen and save it as a ppk private key.
The command to login automatically using a private key with plink is as follows:
1 | plink -i ${KeyPath}/puttygen.ppk ${username@Host} -P ${portNum} "${order}" |
Thus achieving password-less login.
References
Using Travis CI to Automatically Deploy Websites to GitHub
Travis CI Push Permission Configuration
How to Use Travis CI to Automatically Deploy Your Hexo Blog to Github
Disable SSH Host Key Checking