Previously, I found using Blog Garden quite unsatisfactory, and I also tried building my own blog. WordPress is too bloated, and other options don’t have strong functionality (the interface doesn’t look good). After thinking it over, I decided to use GitHub Pages + Hexo to build a static blog, focusing on writing.
As of 2021.03.23, I have been using Hexo to deploy my blog for nearly six years. During these six years, I have written more than a hundred articles, and the way I deployed using Hexo has undergone many changes; writing blogs has gradually become a habit. I vaguely remember one day in college when I wanted to build my own blog, so I spent a day working on this article, and the history of this site began from there. I hope I can continue to use Hexo to write for ten years or twenty years!
Preparation
Install the following software
- node.js
- git
- Register a GitHub account
Configuring and Using GitHub
Configure SSH Keys
How can we establish a connection between the local git project and the remote GitHub? Use SSH keys.
Check the SSH keys settings.
First, we need to check the existing ssh key on your computer:
1 | $ cd ~/.ssh Check the ssh keys on this machine |
If you see: No such file or directory, it means this is your first time using git.
Generate a new SSH Key:
1 | $ ssh-keygen -t rsa -C "email@example.com" |
Note 1: You can enter your own email address here; Note 2: The “-C” is an uppercase “C.”
Then the system will ask you to enter a password:
1 | Enter passphrase (empty for no passphrase):<enter the encrypted string> |
During the prompts, it will ask you to input a password, which will be used when you submit projects. If left blank, you won’t need to input when submitting projects. This setting is to prevent others from submitting content to your project.
Note: When entering the password, there will be no * character displayed; you can just type directly.
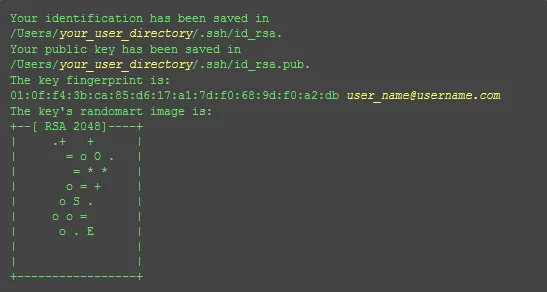
Finally, when you see this interface, the ssh key has been successfully set:
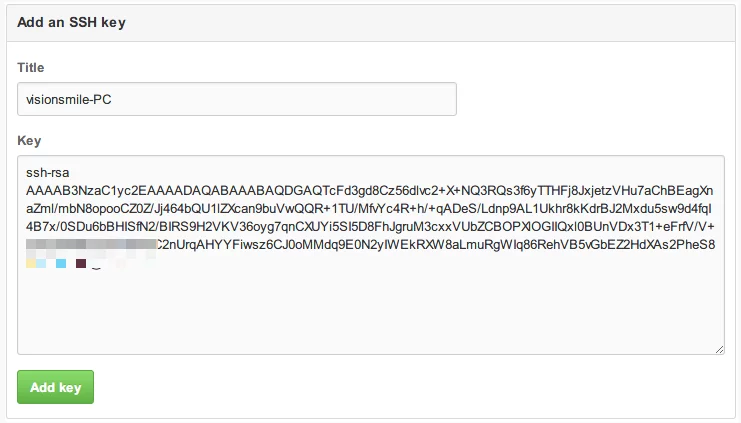
Add SSH Key to GitHub
After setting the SSH Key on your local machine, you need to add it to GitHub to complete the SSH link setup.
- Open the local C:\Users\visionsmile\.ssh\id_rsa.pub file. This file contains the key you just generated. If you can’t see this file, you need to set it to show hidden files. Accurately copy the content of this file to ensure successful setup.
- Log into GitHub. Click on the upper right corner to Settings -> SSH keys -> ADD SSH Key.
- Paste your locally generated key into the input box (key textbox), then click add key, and you’re done.
Test
You can enter the following command to see if the setup was successful; do not modify the git@github.com part:
1 | $ ssh -T git@github.com |
If you receive the following feedback:
1 | The authenticity of host 'github.com (207.97.227.239)' can't be established. |
Don’t be nervous; just type yes, and you will see:
1 | Hi hxhb! You've successfully authenticated, but GitHub does not provide bash access. |
Set User Information
Now you can connect to GitHub via SSH; there’s still some personal information to complete.
Git will track commits based on the user’s name and email. GitHub uses this information for permission handling. Input the code below to set your personal information, replacing the name and email with your own. The name must be your real name, not GitHub nicknames.
1 | $ git config --global user.name "hxhb" // username |
SSH Key configuration successful.
The local machine has successfully connected to GitHub.
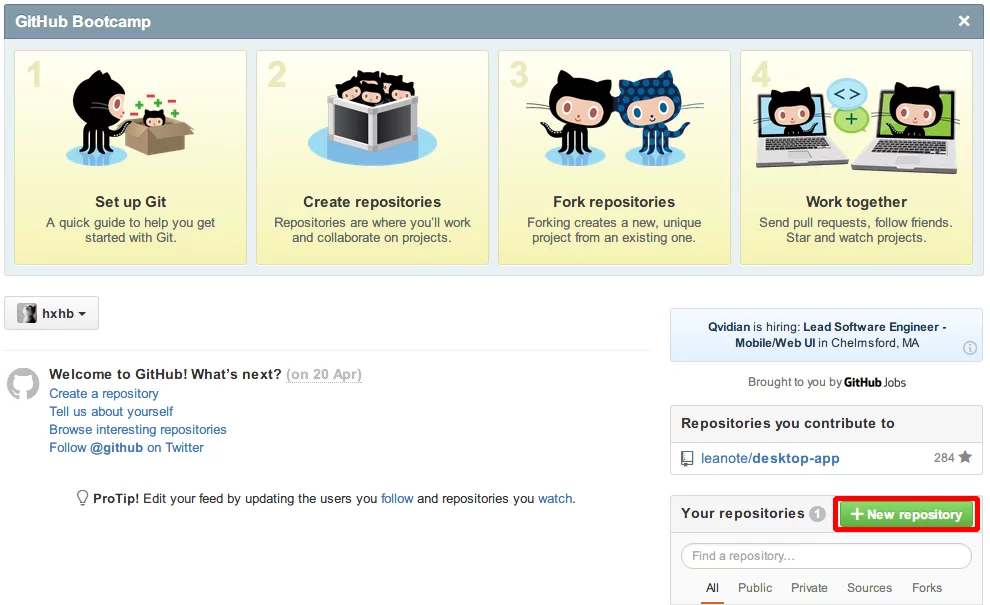
Create a Repository on GitHub
After logging in, on the GitHub homepage, click the “New Repository” button at the bottom right of the page.
Fill in Project Information
project name: username.github.io
description: Writing 1000 Words a Day Changed My Life
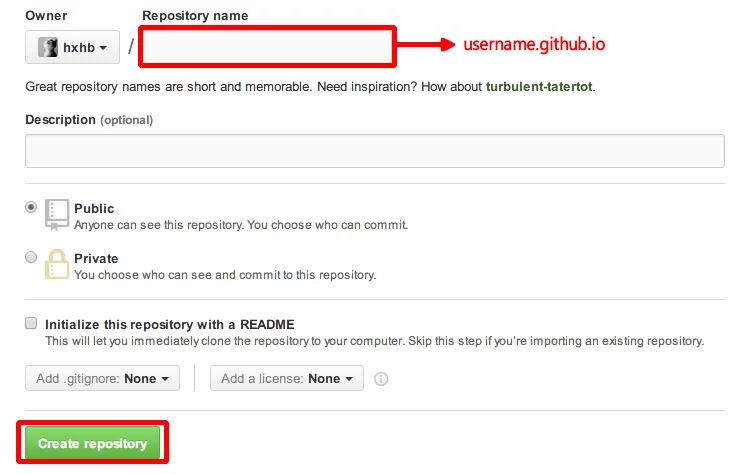
Note: The Repository name for GitHub Pages is specific. For example, if my GitHub account is hxhb, then my GitHub Pages Repository name will be hxhb.github.io.
Install Hexo
Open git Bash (directly type in the terminal on Linux)
1 | $ npm install -g hexo |
Note: On Linux, you may need to update nodejs before installing hexo; you can use the following commands:
1 | $ sudo npm cache clean -f |
Deploy Hexo
Create a Blog folder, then open Git Bash in that folder.
1 | $ hexo init |
Hexo will automatically create all the files needed for the website in the target folder.
Now we have set up a local hexo blog. Execute the following commands, then enter localhost:4000 in the browser to check.
1 | $ hexo g |
Install Theme
1 | $ git clone https://github.com/iissnan/hexo-theme-next.git themes/next |
Enable the next theme
Modify the theme attribute in the config.yml configuration file under the Hexo directory to set it to next.
1 | theme: next |
Note: Hexo has two config.yml files, one in the root directory and one in the theme directory. Here, we are modifying the one in the root directory.
Update Theme
1 | $ cd themes/jacman |
Note: To avoid errors, please back up your _config.yml file before upgrading.
Use and Debug
If you need to preview or debug your blog locally, you can start the local server:
1 | hexo server |
Before deploying to GitHub, you need to configure the _config.yml file.
1 | deploy: |
Since the type is git, you need to install hexo-deployer-git before deploying to GitHub:
1 | $ npm install hexo-deployer-git --save |
Then execute the following commands to complete the deployment; note that deployment will overwrite the files you previously stored in the repository.
1 | $ hexo clean |
You may also add the —generate option to automatically generate files before deployment.
Local viewing and debugging:
1 | $ hexo g # generate |
Or directly use the combined command:
1 | $ hexo d -g |
For subsequent changes to the _config.yml file or uploaded files, you can use this command for debugging, which is very useful, especially when you want to debug the theme you want.
For details, refer to: How to Build an Independent Blog - A Concise Tutorial on GitHub Pages and Hexo
Update
My Hexo-related deployment articles:
- Building a Github Pages + Hexo Blog
- Using GitHub to Manage Blog Source Files
- Managing Static Blogs Online with Koding
- Automatically Deploying GitHub/Coding Pages Blogs with Travis CI
Currently, my blog deployment scheme is Dropbox + GitHub Actions, and it is hosted on domestic OSS + CDN, allowing for one-click publishing and deployment of the blog.