During the New Year’s holiday, my iPhone 12 dropped and caused some malfunctions, making it barely usable. However, recently the battery also swelled and it easily shut down automatically, rendering it completely unusable. After switching to a backup phone, it was set aside for a while.
I recently thought of it again, as it could still power on normally and most of its main functions could still operate, so I speculated that it was only partially faulty and not completely damaged. It would be a pity to completely scrap it, and it seems I can only swap it for a stainless steel basin.
I took it apart to analyze the cause of the faults and attempted to buy parts for repair. This article documents the disassembly and resolution process.
Fault Analysis
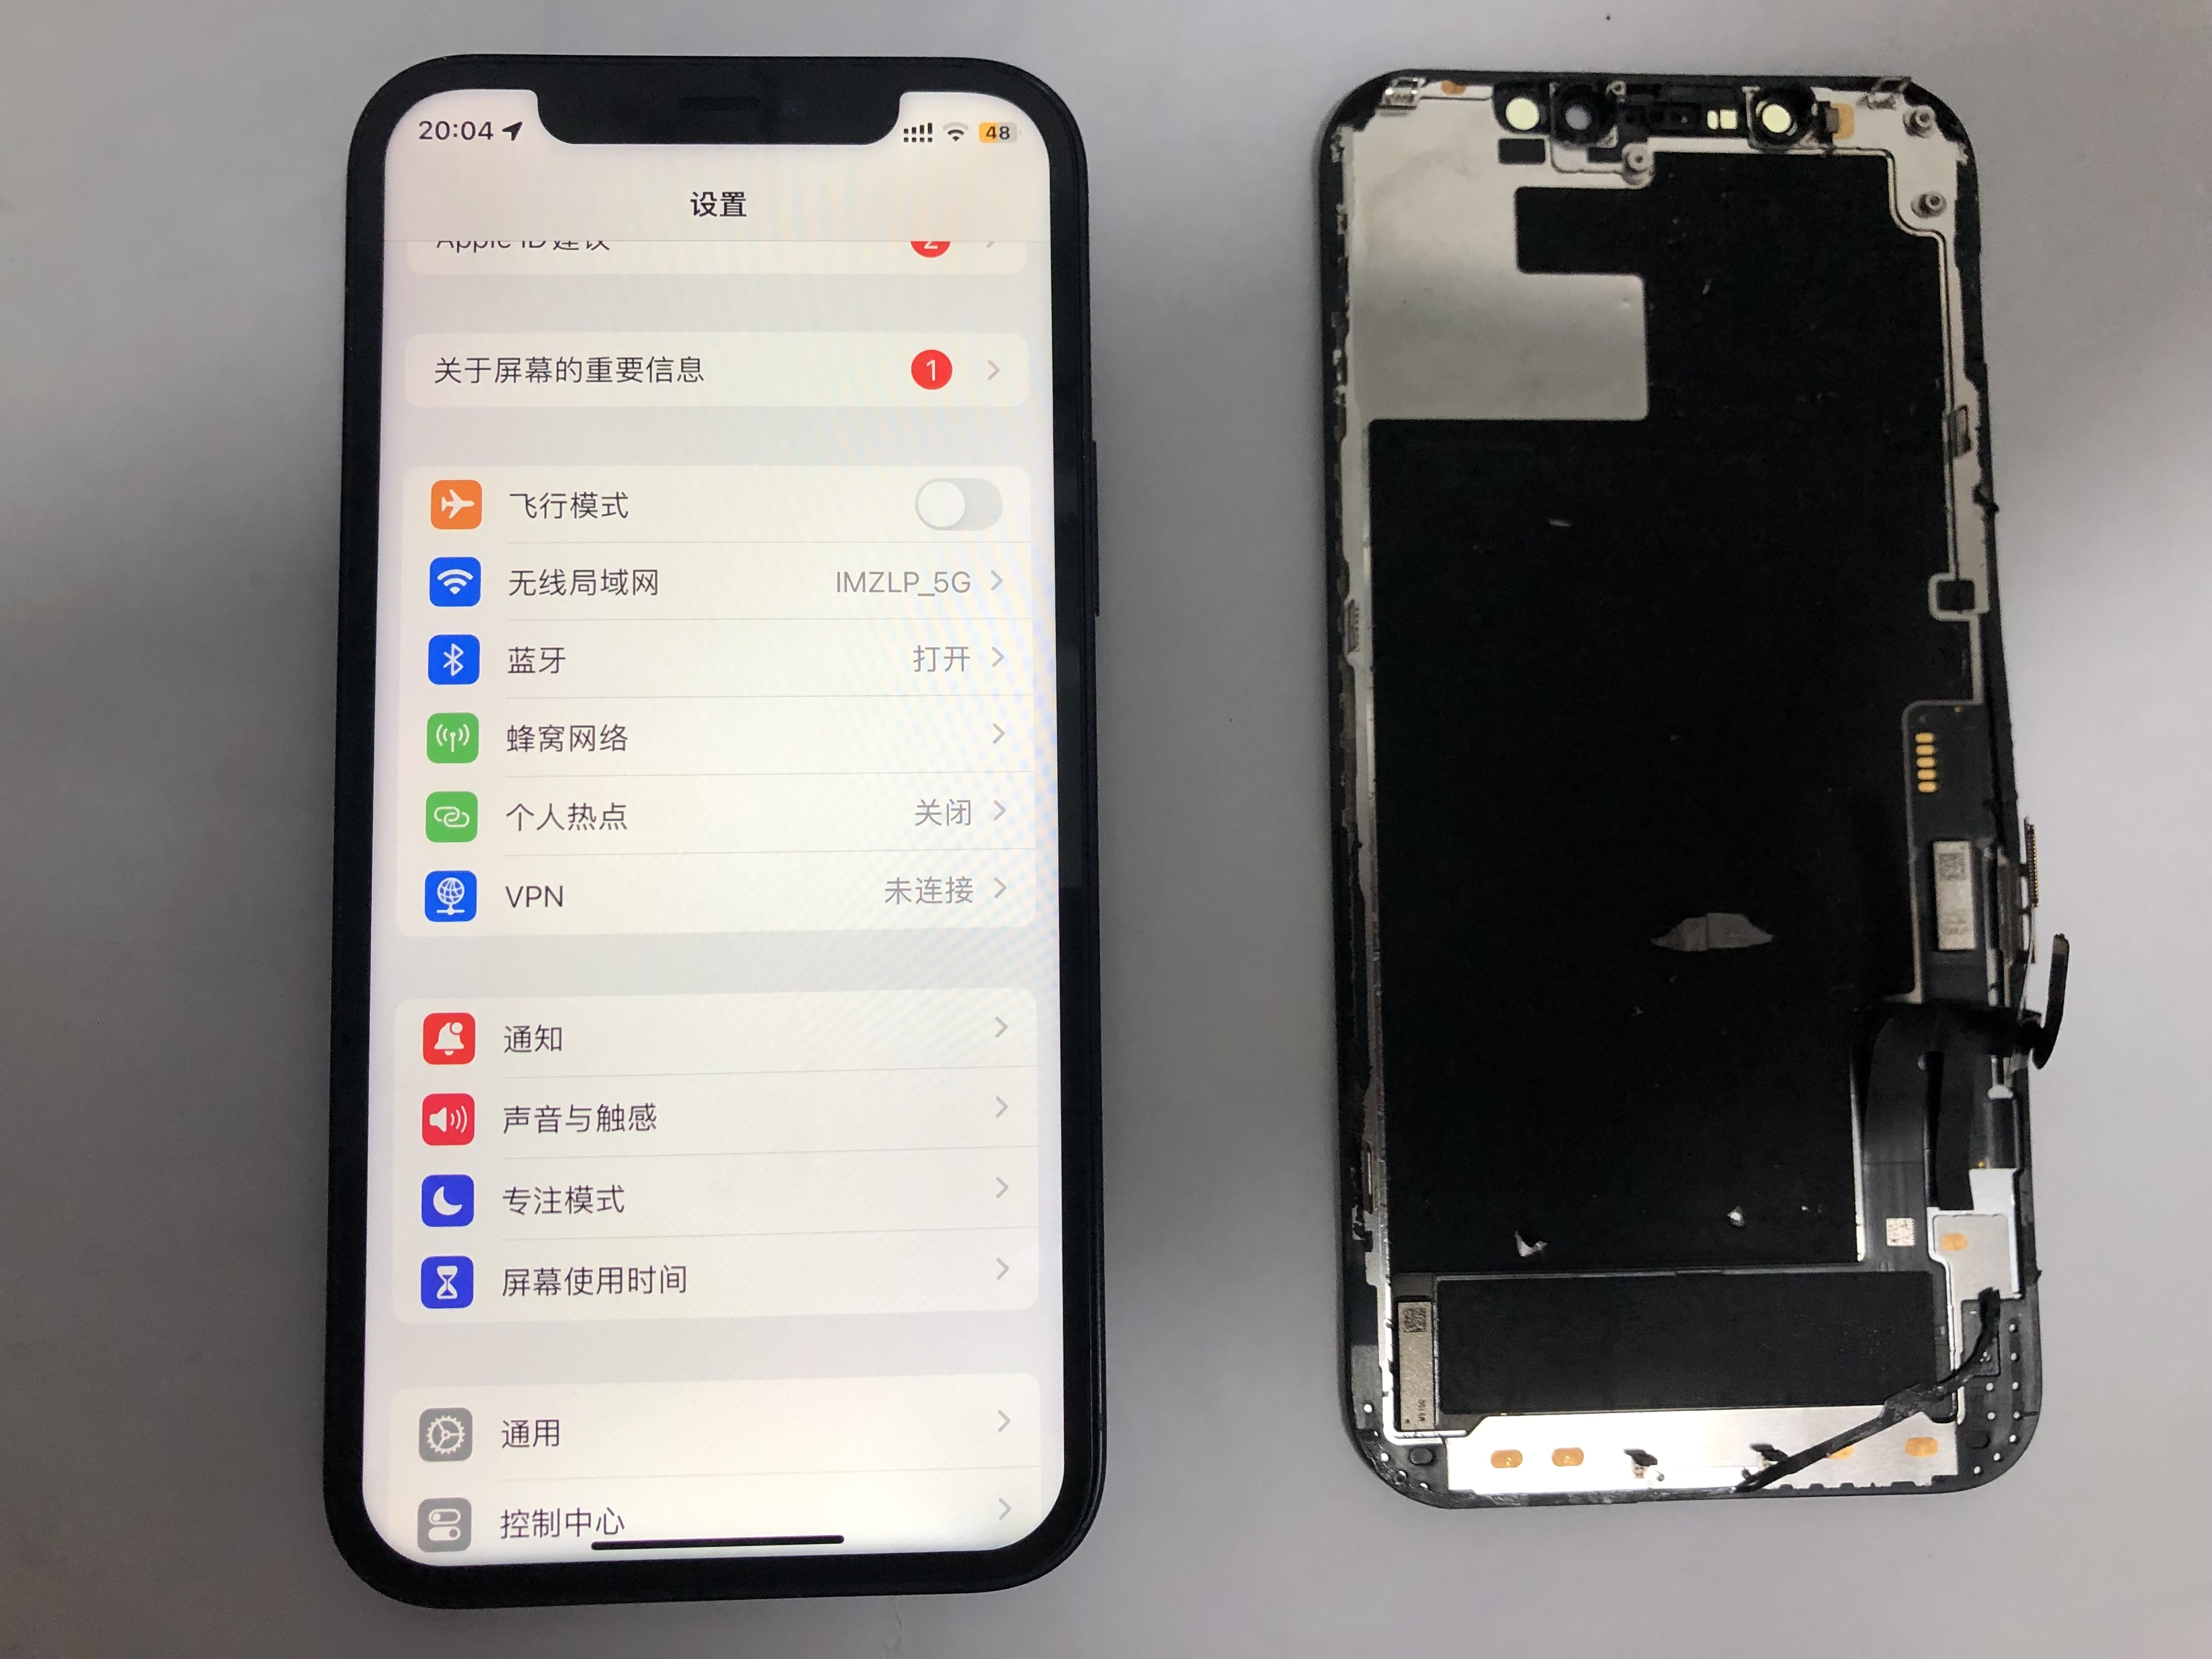
Symptoms
| Appearance | Hardware | Functions |
|---|---|---|
| Back cover cracked Midframe bent |
Silent button failure Volume button failure Swollen battery Slight liquid leakage at the screen edges |
WIFI hotspot unable to start Wireless charging failure No magnetic attraction |
Causes
| Fault | Cause | Solution |
|---|---|---|
| Back cover cracked Midframe bent |
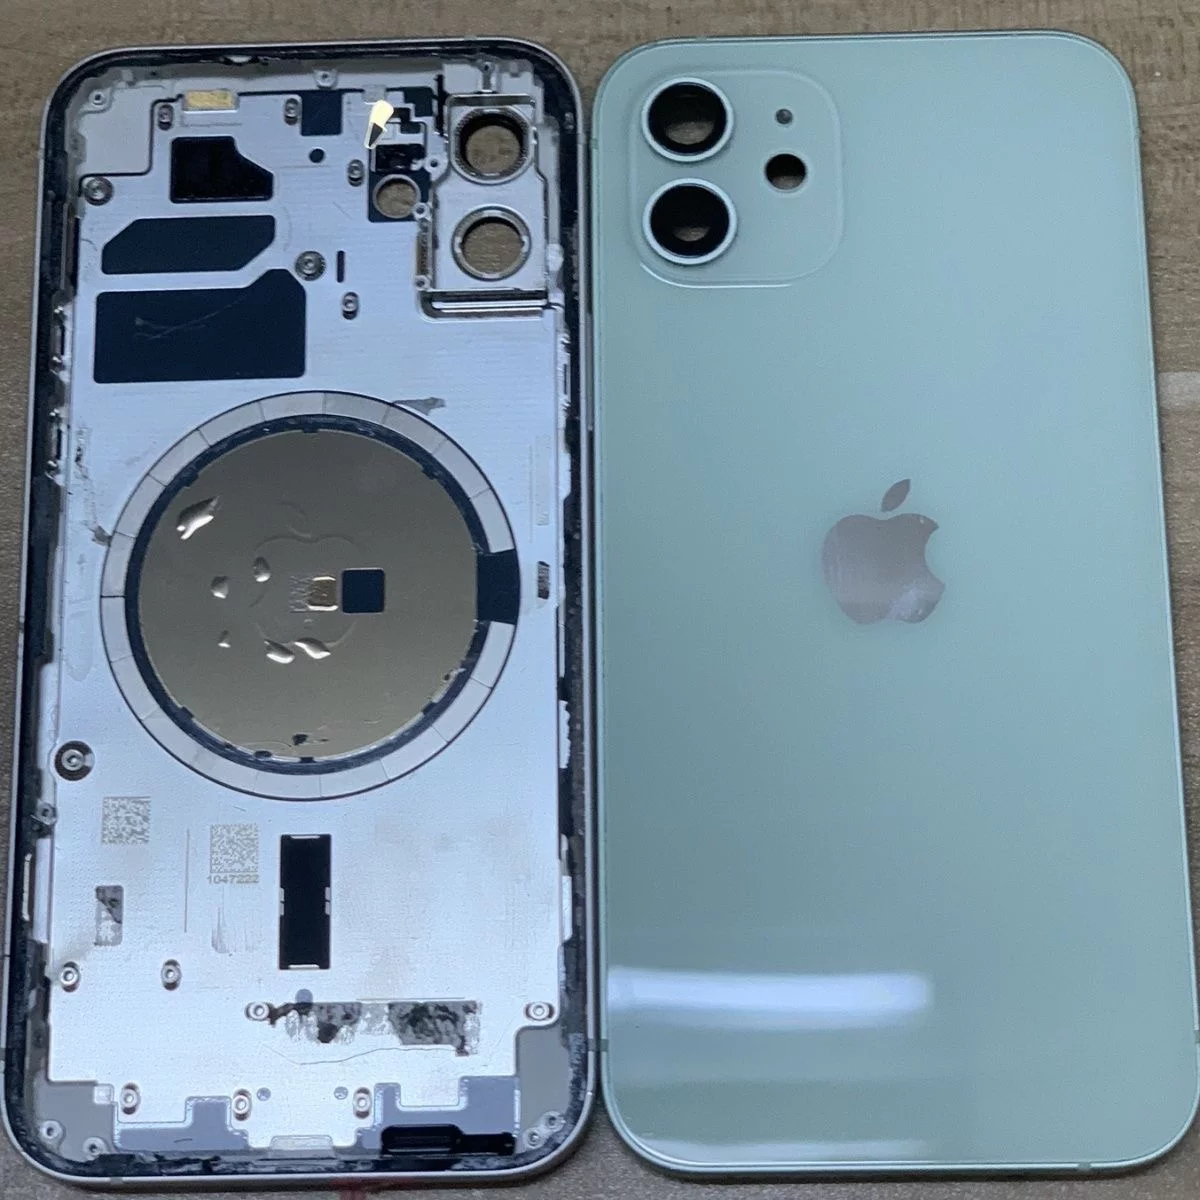
Drop impact | Replace with a new rear shell assembly |
| Silent, volume button failure | Volume, silent button flex cable broken | The power and volume, silent buttons are on the same flex cable, need to replace the entire power flex cable |
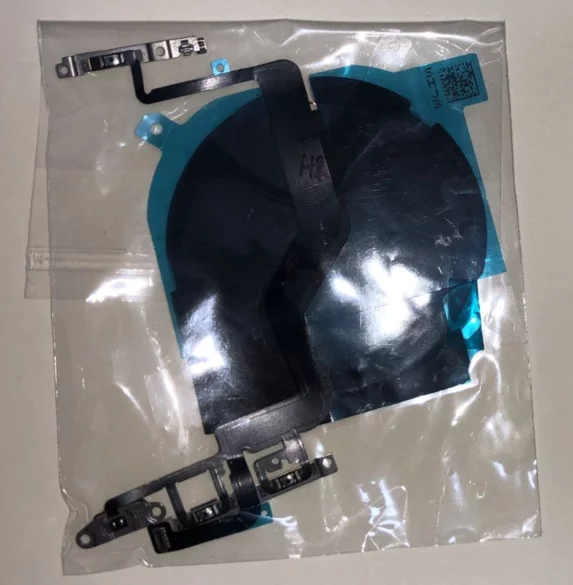
| Wireless charging failure | Wireless charging coil broken | Needs to be replaced along with the power flex cable |
| No magnetic attraction | The permanent magnets surrounding the wireless charging coil have all fallen off | Some rear shell assemblies come with magnets, and when buying the wireless charging module, it will come with magnets |
| Swollen battery | Drop compression damage | Need to purchase a new battery |
| Slight liquid leakage at the screen edges | Drop damage | Screen liquid leakage repair can only be done by replacing the screen assembly, |
Purchased parts:
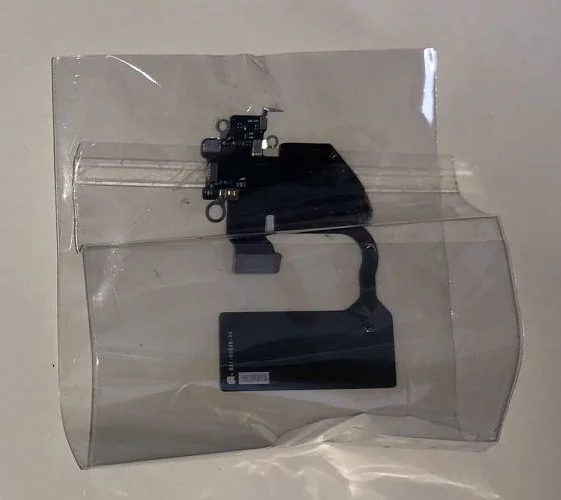
| Wireless charging and power flex cable | wifi antenna | Fei Maotai 3320mAh battery | Rear shell assembly (seller’s picture) | Rui Ju LCD screen |
|---|---|---|---|---|
 |
 |
 |
 |
 |
Costs:
- Disassembly rear shell assembly: 67.86 yuan
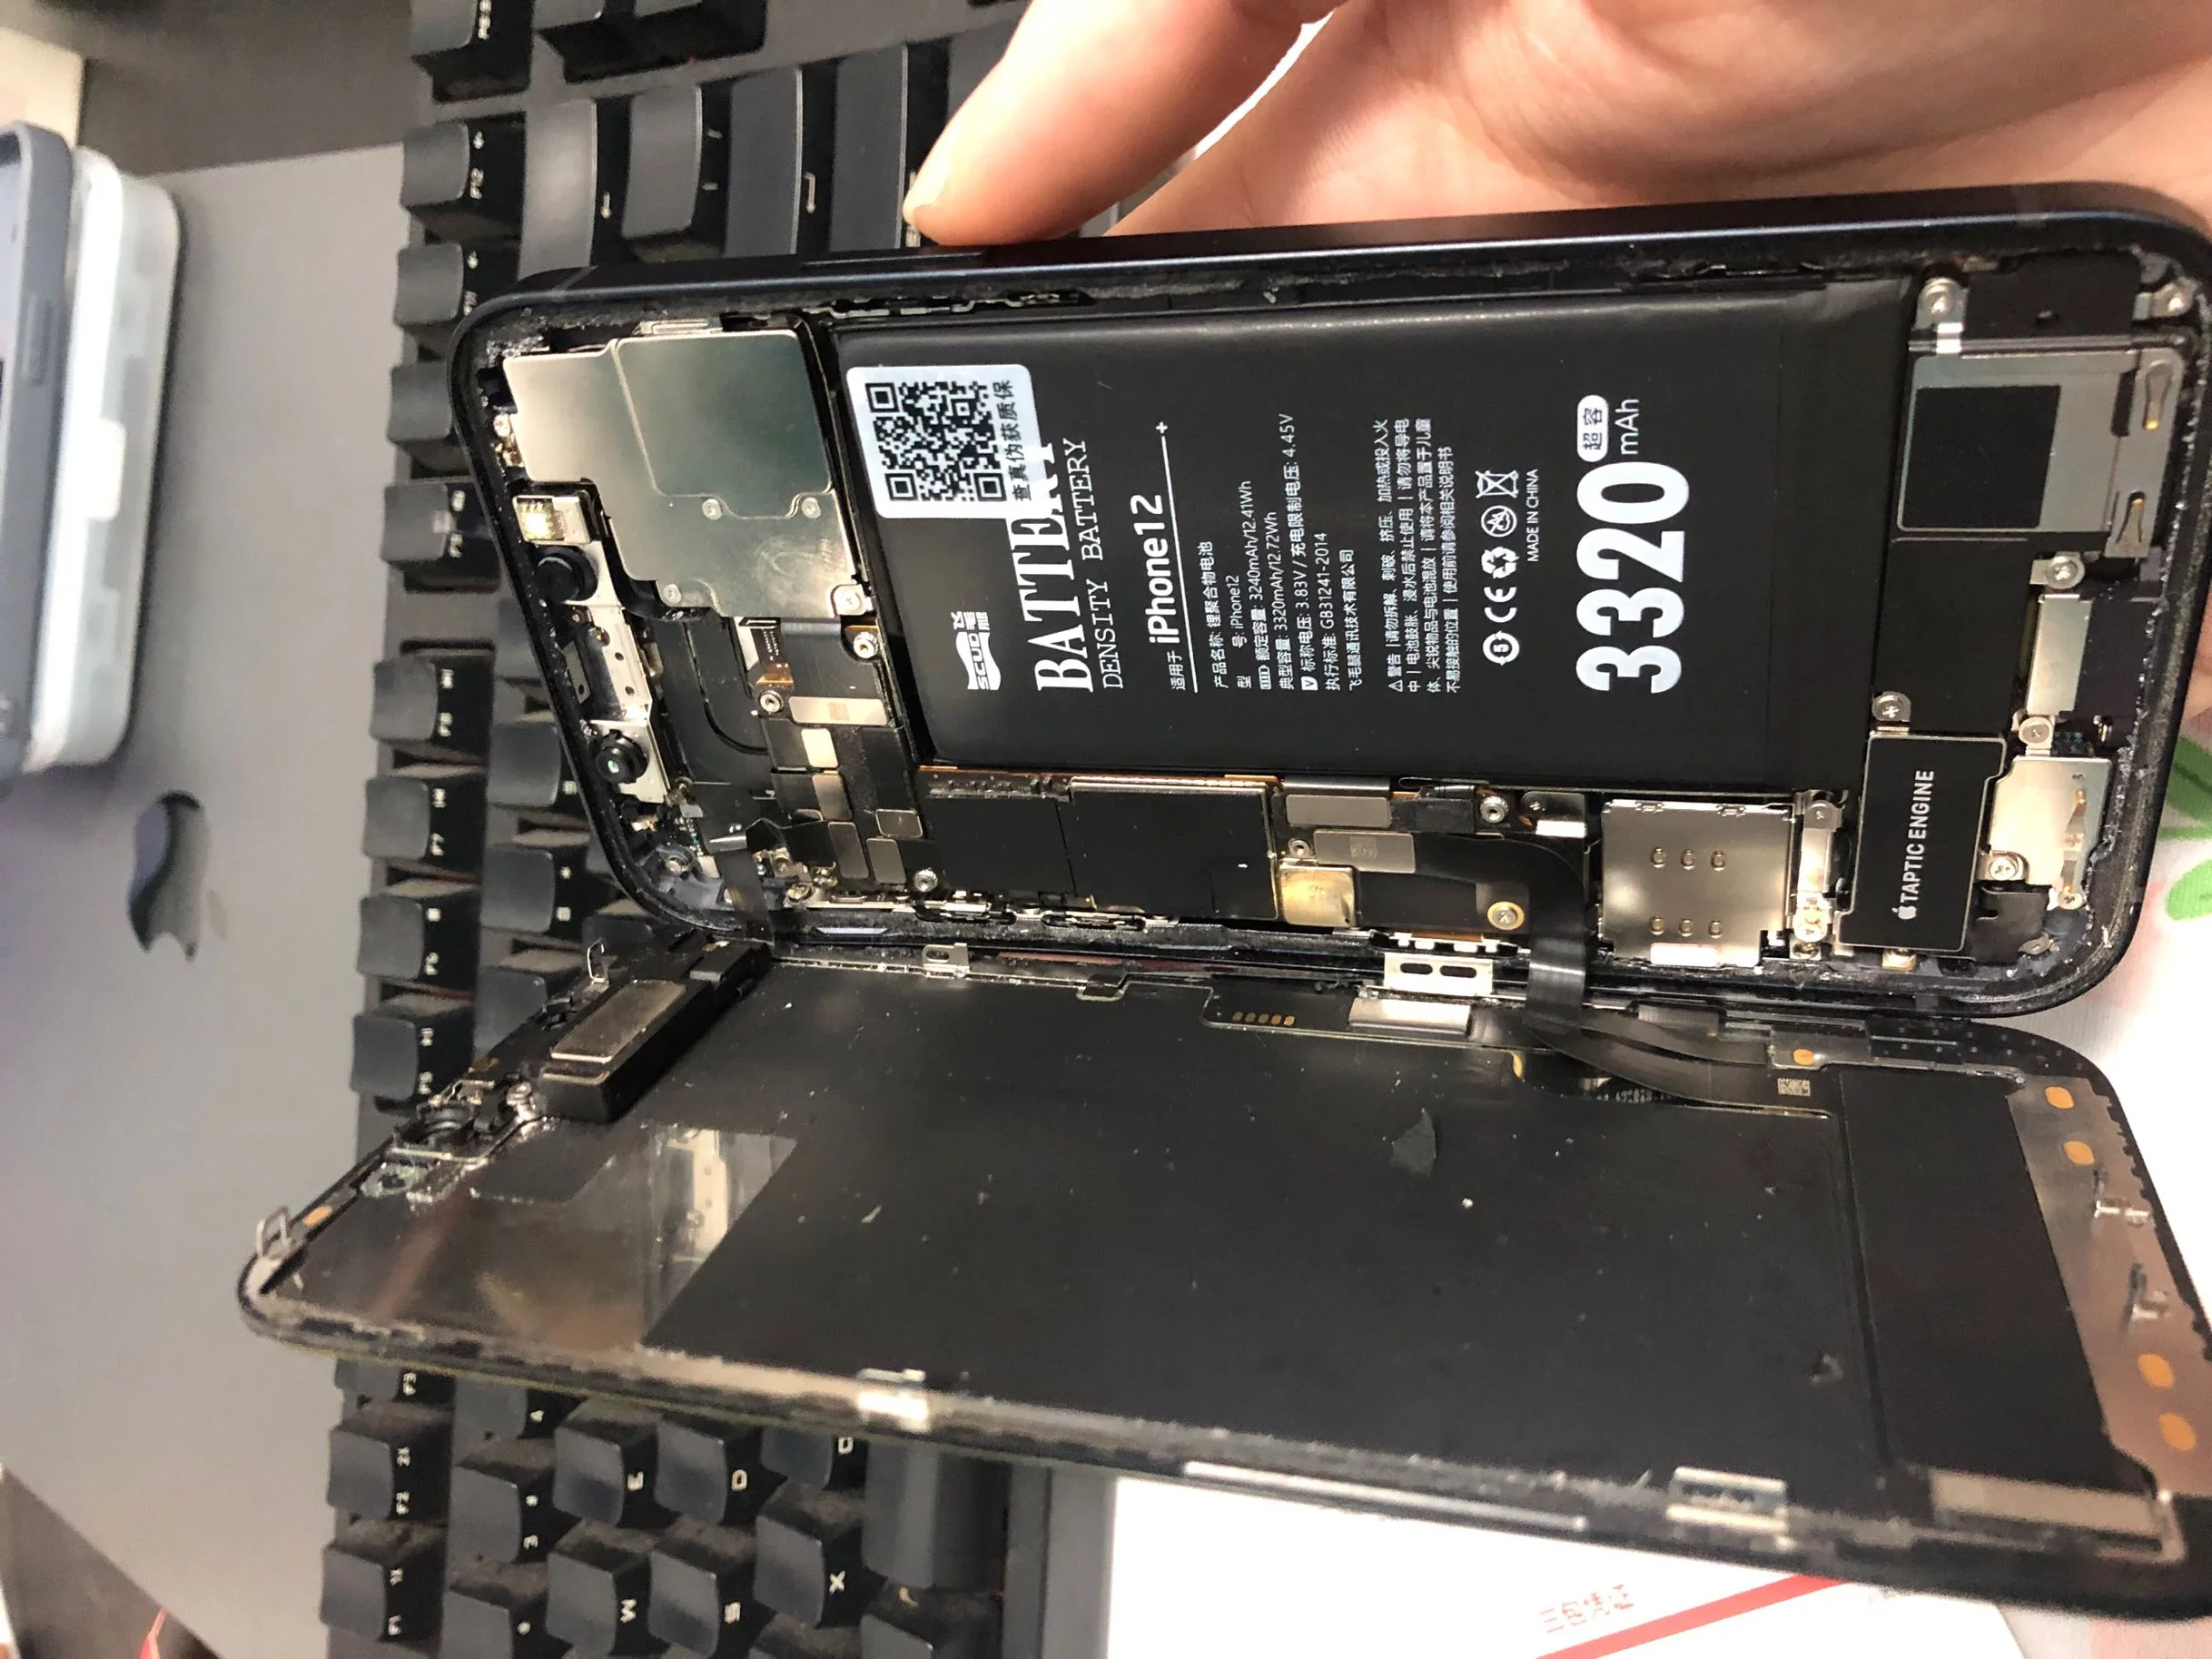
- Fei Maotai 3320mAh battery: 139 yuan
- Wireless charging module + power volume button flex cable: 21 yuan
- Wifi antenna module: 12 yuan
- Rui Ju LCD screen: 126 yuan
Total: 365.86 yuan
Since the rear shell assembly needs to be replaced, all parts from the old rear shell assembly must be disassembled and then installed into the new rear shell assembly.
Note: Apple phones use many special specifications of screws internally, it is recommended to use a suitable screwdriver set. I used IKEA’s screwdriver set, and the quality is decent.
Suggestion: Because there are many internal components and screws, if you disassemble everything at once and pile them together, it will be difficult to restore them. My suggestion is to use sticky notes to fold some bags to store the screws and components for each step below. This way, when reassembling, you won’t have trouble finding the corresponding screws, and you can revert to the disassembly order.
Disassembly
Screen
- Unscrew the 2 screws on both sides of the bottom charging port.
- Use a hairdryer to heat around the screen, use a suction cup to open the gap, insert a pick, and gently slide it around, lifting the screen from the right side (there’s a flex cable on the left side of the iP12).
- Remove the shielding cover of the screen flex cable (2 screws).
- Remove the shielding cover of the earpiece flex cable (4 screws).
- Disconnect the battery flex cable.
- Disconnect the screen and earpiece flex cables (three).
- The screen can now be completely separated from the body.
Motherboard, Face ID
- Remove the camera shielding cover (4 triangular screws, 1 cross screw).
- SIM card reader shielding cover (2 screws).

- Disconnect all flex cables from the motherboard (11, some flex cable connectors are hidden under another flex cable, be careful).
- Unscrew the four screws securing the motherboard.
- Lift the black adhesive on the motherboard to slowly lift the volume and power flex cables.
- Remove the camera (be careful of dust).
- Remove the motherboard.
- Gently lift the Face ID flex cable, remove the front camera and Face ID component (be careful of dust).
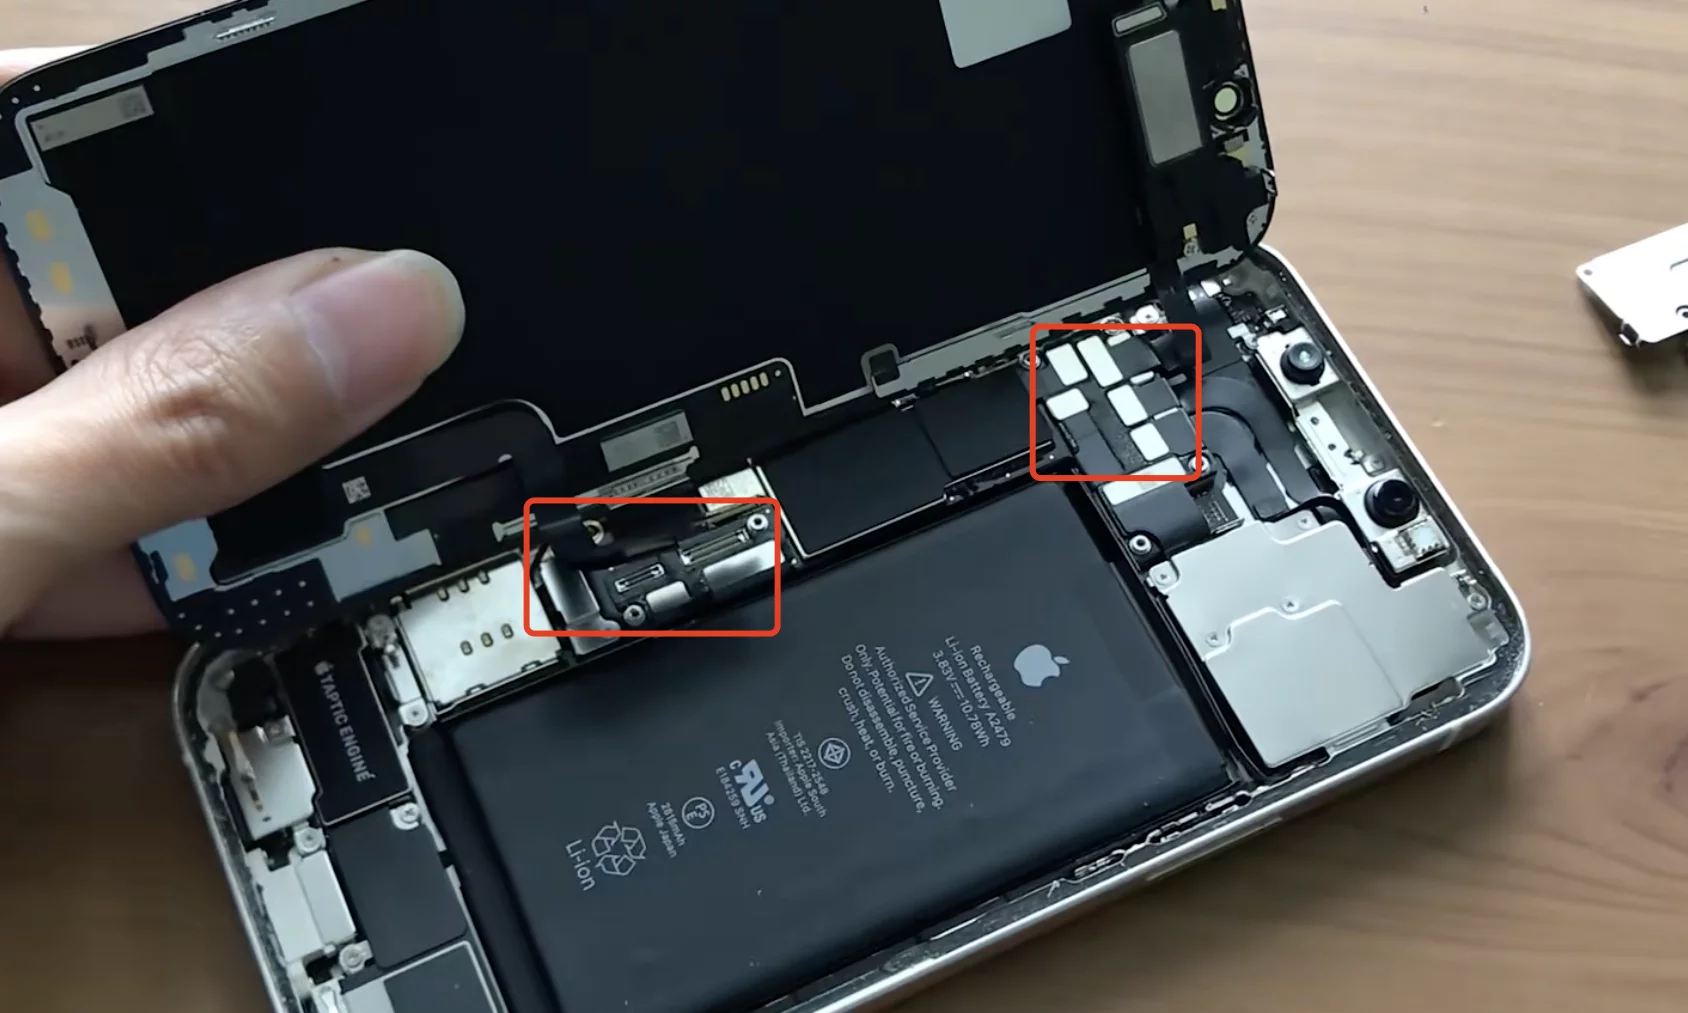
Lightning Connector
Remove the SIM card tray.
Unscrew 4 screws and take off the vibration flex cable’s pressure plate.
![]()
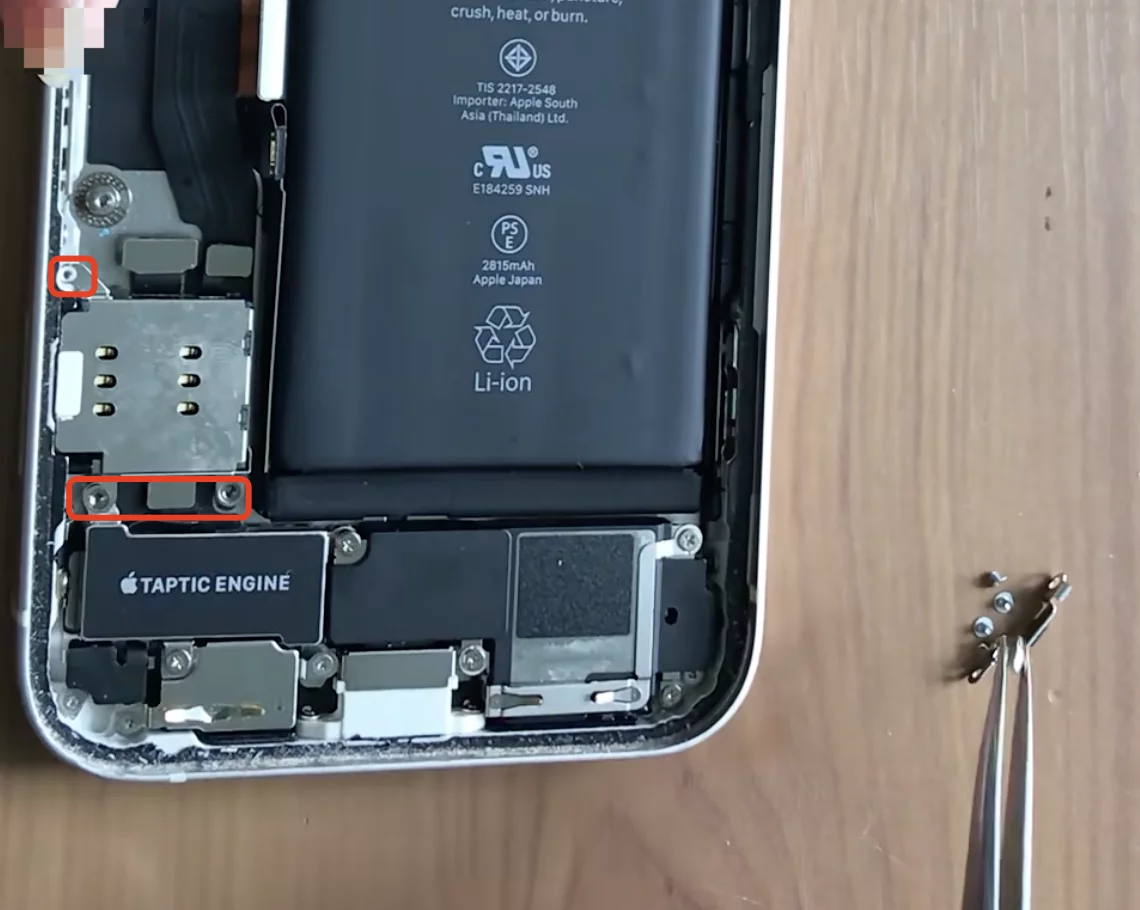
Remove the SIM card reader.
Unscrew 4 screws on the speaker to remove the speaker.
![]()
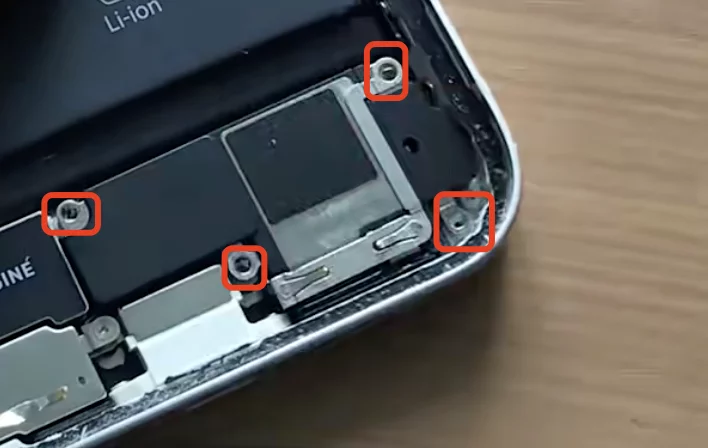
Unscrew 3 screws on the vibration module, disconnect the vibration motor flex cable to remove the vibration motor.
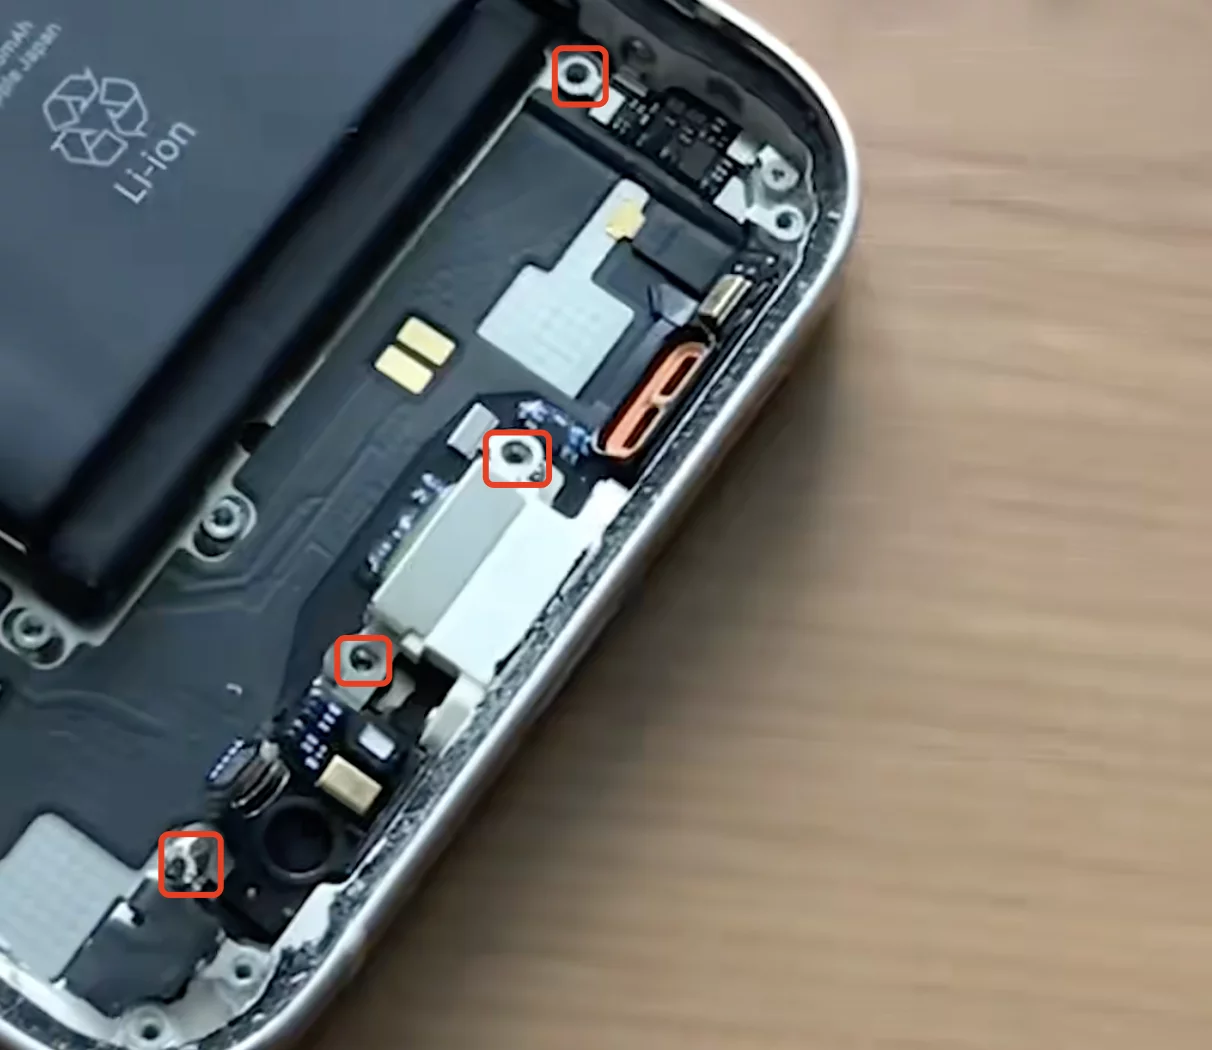
Unscrew the 2 cross screws and 3 Y screws on the left side of the original vibration motor location to remove the left microphone fixation plate.
![]()
![]()
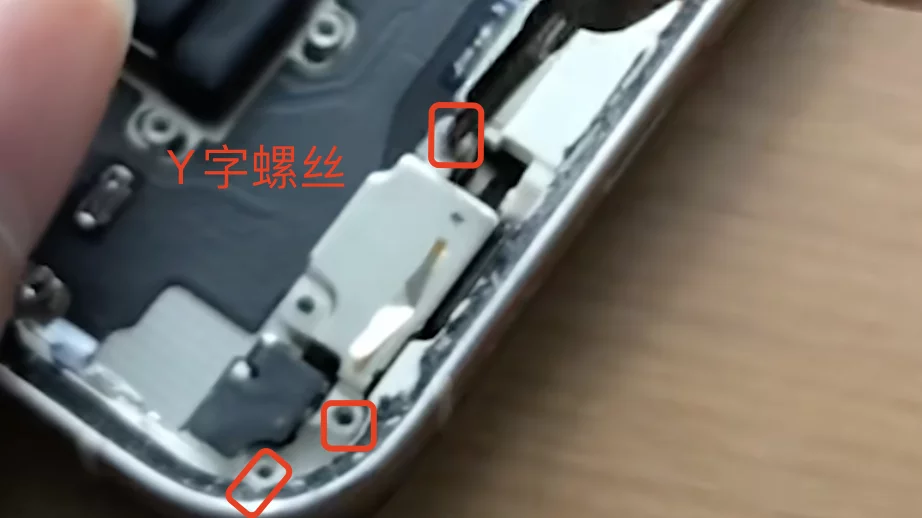
Unscrew 4 double-headed screws and 2 Y screws.
![]()
![]()
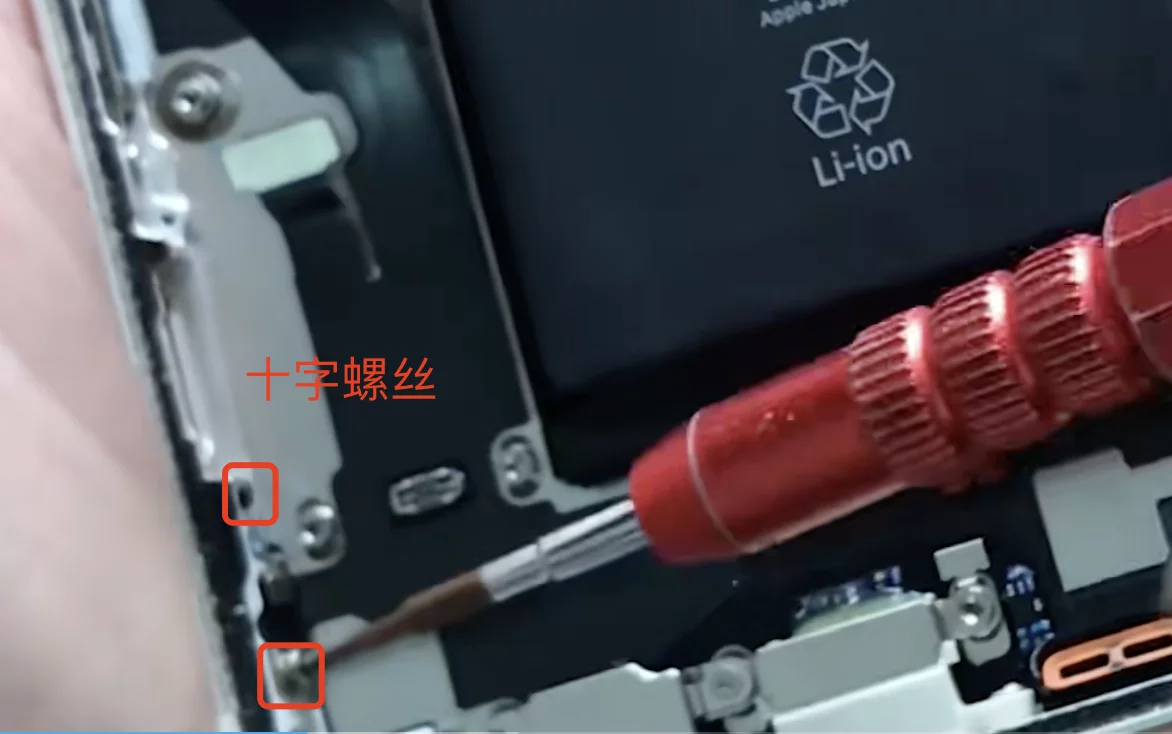
And finally 2 cross screws.
![]()
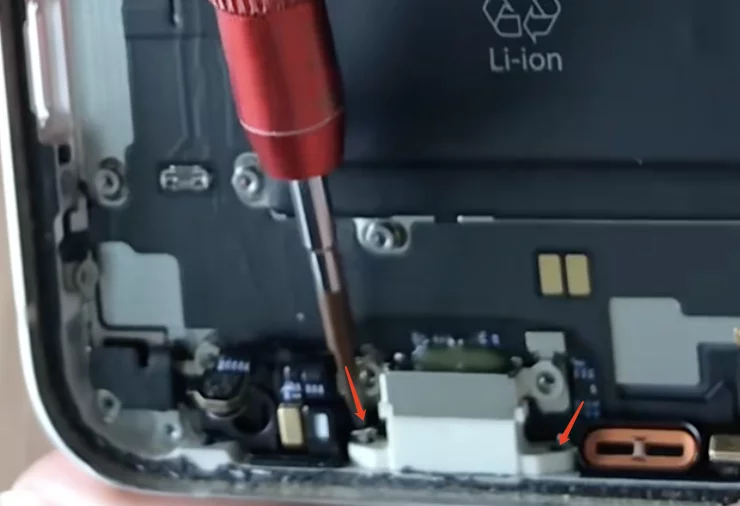
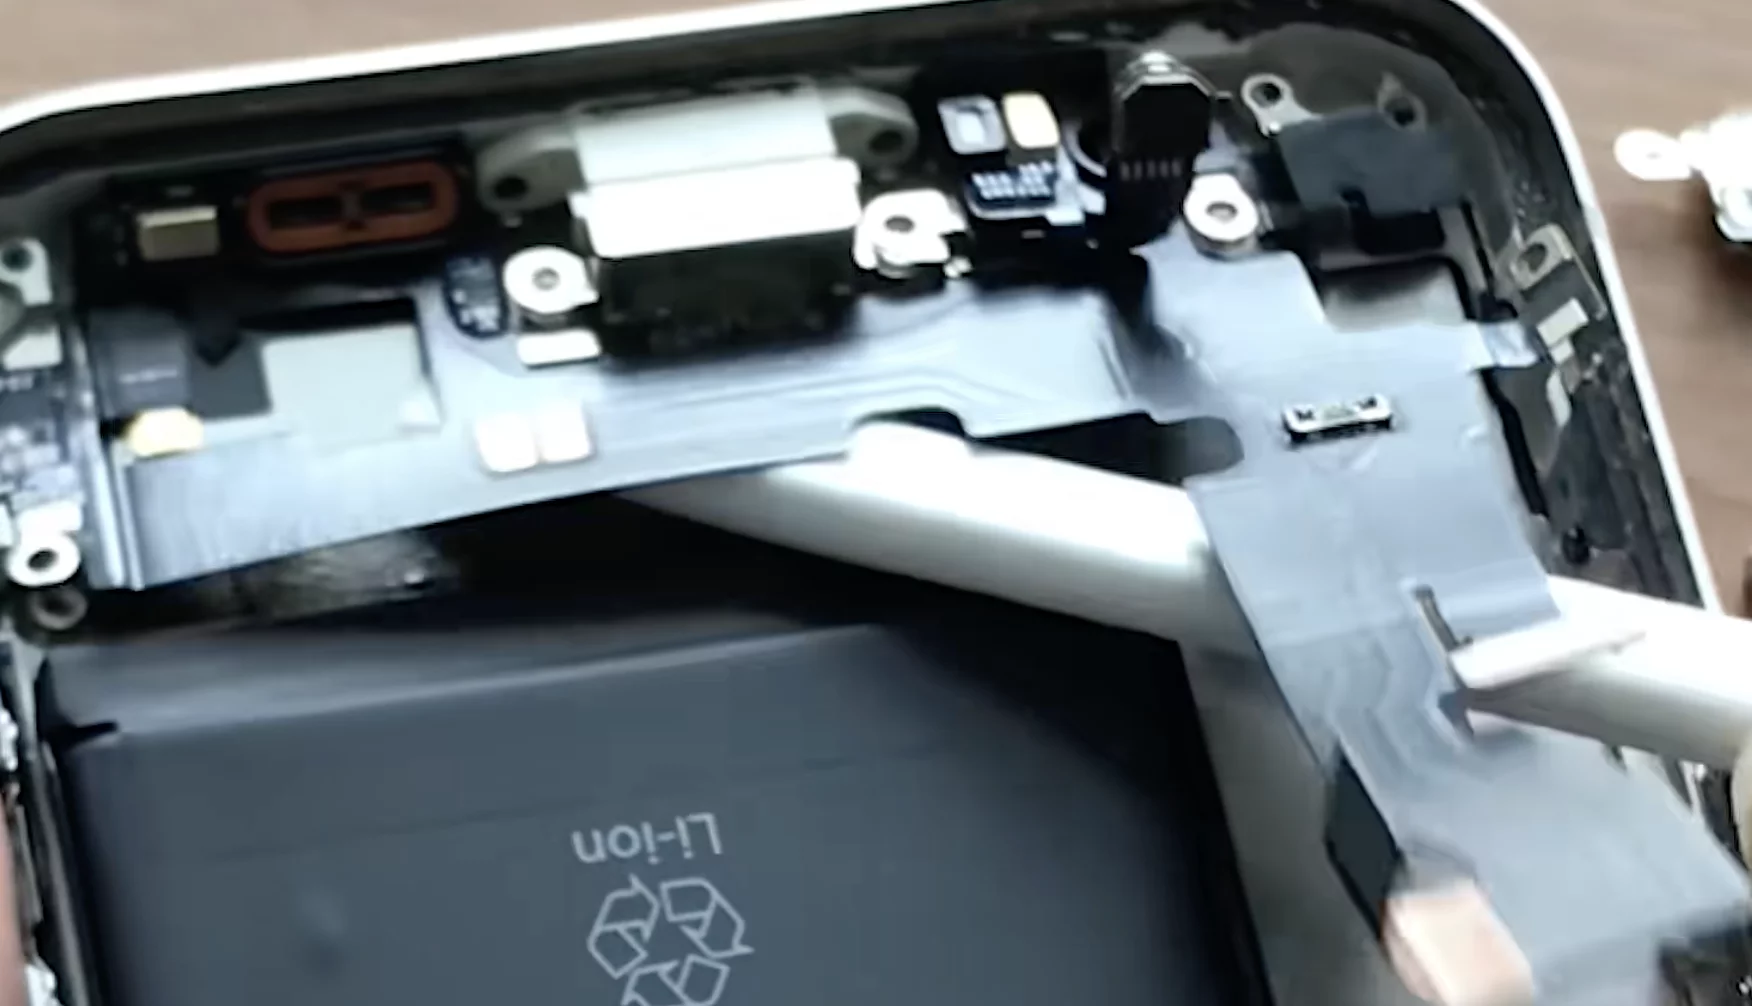
Use a hairdryer to heat the lightning connector flex cable.
Separate the lightning connector flex cable (be careful not to tear it, there’s adhesive).
![]()
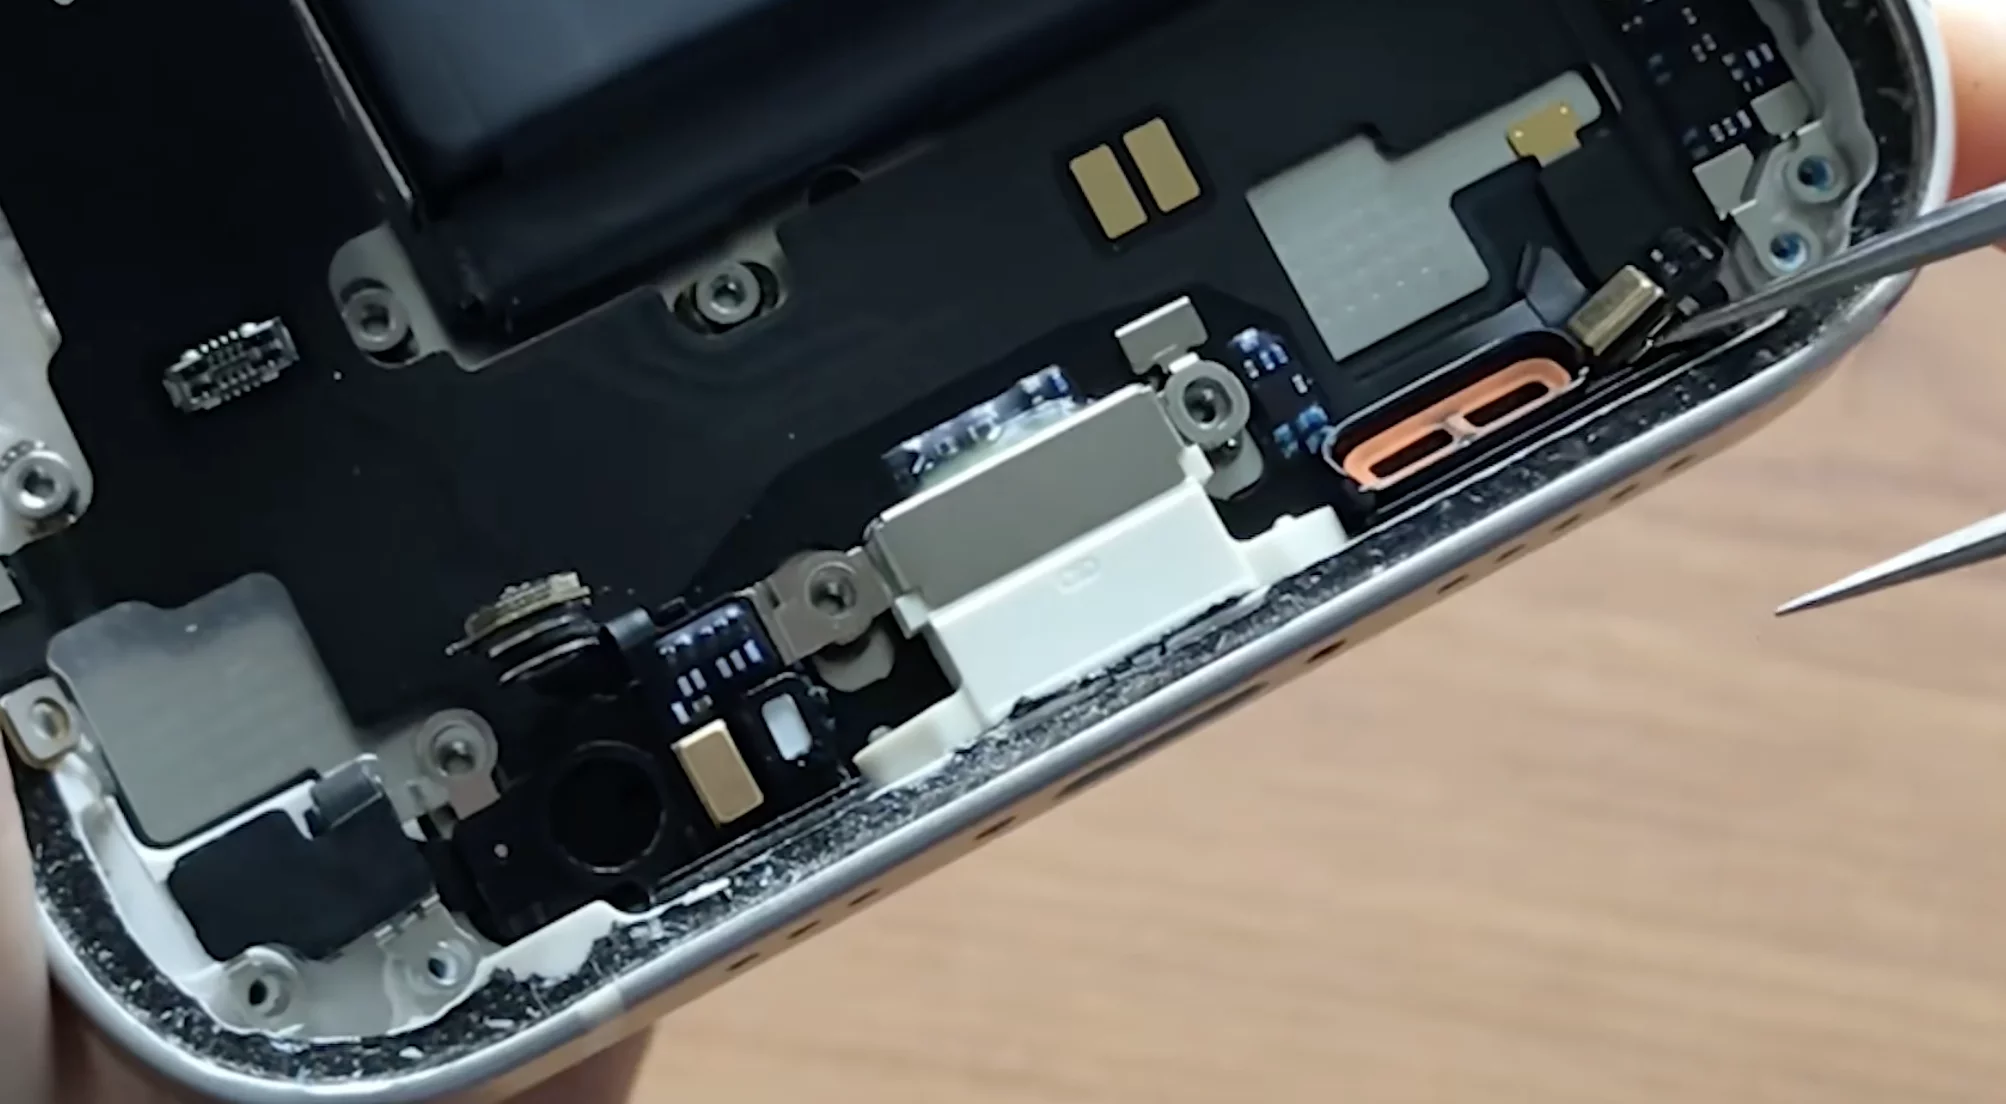
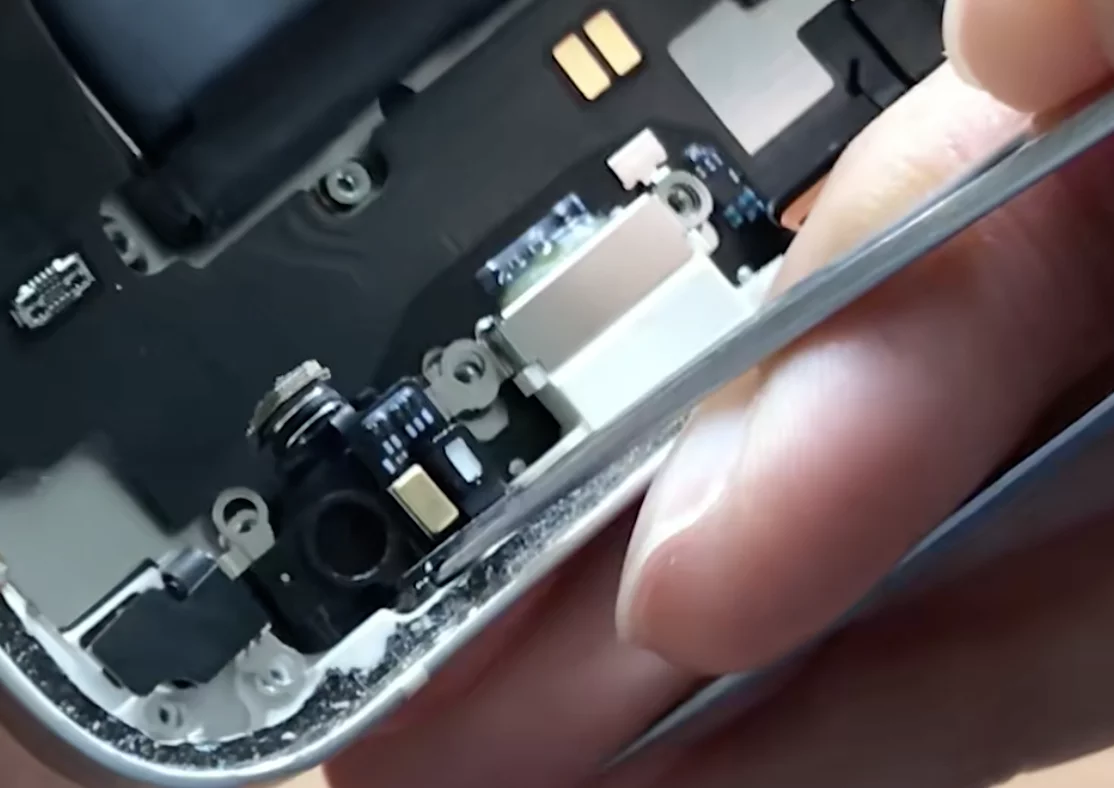
Use tweezers to pry the microphones on both sides from the rear cover, separating them (control the force so you don’t pull them off).
![]()
![]()
The entire lightning connector flex cable can now be removed.

At this point, the lightning connector part has been completely separated and can first be installed onto the new rear cover assembly along with the SIM card slot and vibration component.
Top
The components at the top of the phone are: front camera & Face ID, rear camera, flash, Wifi antenna, Bluetooth antenna.
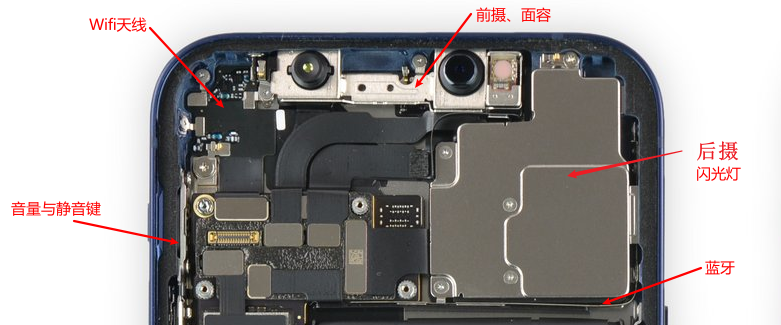
When removing the motherboard, the rear camera shield has already been unscrewed. These components are relatively independent and don’t stack like the lightning connector, making them easier to remove, so I won’t elaborate here.
Others
In addition to these components, there are some other small parts that need to be removed:
- The buttons for volume, silent, and power (the button material is plastic and care must be taken during installation to avoid breaking the button pillars.)
- The locking clips for fixing the screen also need to be removed.
- There is a small black plastic pillar on the inside of the SIM card slot that is used to push up the slot when the SIM ejection tool is inserted.
Be attentive and ensure not to overlook any removable parts.
Screen
The previous liquid leakage issue has become increasingly severe recently, with noticeable screen flickering occurring at low brightness. So I bought a low-priced domestic LCD screen replacement, which supports True Tone, for 120 yuan with 6 yuan shipping.
The effect is decent, achieving about 80% of the original screen’s quality; the touch sampling rate is not high, which might not be good for gaming, but the ordinary usage feels fine. Additionally, the LCD screen is slightly thicker and may cause the bottom to heat up due to its light-emitting characteristics. After using it for a day, the display effect seems fine, but the battery life has significantly decreased.
Installation notes:
- Inform the seller to enable True Tone support when purchasing; otherwise, the feature won’t be available.
- The earpiece and ambient light/distance sensor components from the original screen need to be removed; ensure to align the holes properly, otherwise the ambient light sensor adjustment will fail.
- The True Tone can only be activated when the earpiece is installed and the Face ID is functional.
Results
Following the above steps, I disassembled each component and replaced those that were damaged, then assembled everything onto the new rear cover assembly.
With the new battery offering better endurance, the screen leakage issue was addressed by replacing it with Rui Ju’s domestic LCD screen assembly that supports True Tone.
Ultimately, this nearly scrapped phone restored all functions to normal and can now be used as a backup phone.
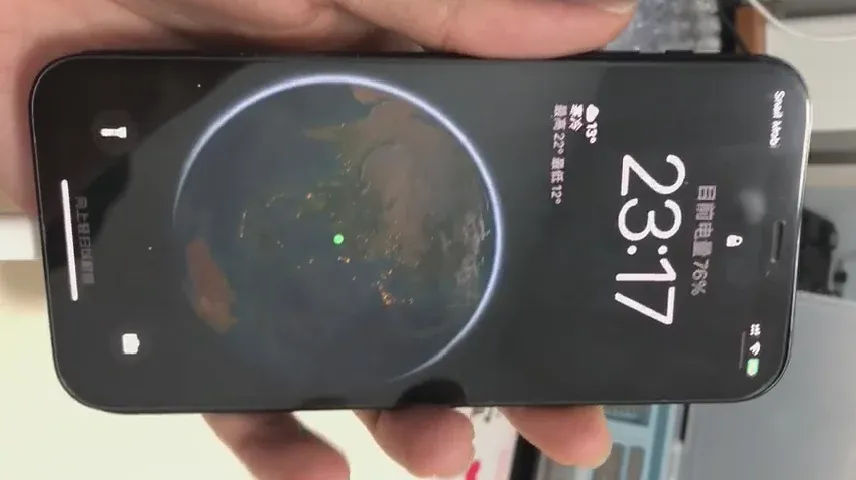
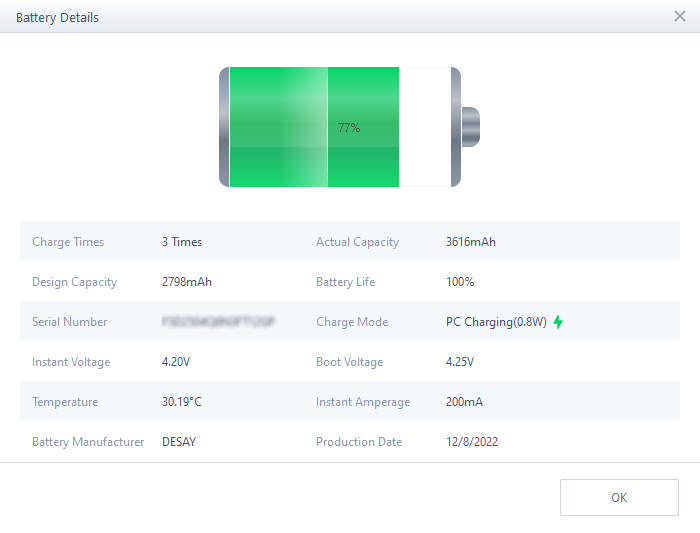
The original iPhone 12 has a battery capacity of 2815mAh, while the old battery’s health dropped to 77%, it would basically die in half a day. After replacing it, the capacity is now 3320mAh, which is 505mAh more than the original, and the new battery’s health is better, leading to improved endurance:
References
Conclusion
After personally disassembling and reinstalling every screw and component on the phone, I deeply appreciate the marvel of modern industry and the solid materials used in Apple products. As for the repair itself, it’s essentially about replacing parts; I believe there’s not much technical skill involved—knowing how to twist screws + patience + carefulness will get the job done.
Here in Shenzhen, purchasing parts in Huaqiangbei is also very convenient. Although I bought on Taobao, the items were shipped from Huaqiangbei as well. The prices for disassembled components are quite cheap; for example, the Wifi antenna and wireless charging module I purchased only cost a few dozen yuan, while repair services would likely be very expensive.
For simple repairs on Apple phones, I think doing it yourself is completely feasible; the real issue is laziness and worrying about breaking something. It’s actually not that hard.
Modern electronic products are all modular; it is very easy to refurbish them. The problem of replacing old with new and using inferior components is also a common issue with second-hand electronics nowadays, so careful consideration is needed when buying second-hand or non-official channel products. They may look brand new, but the internal components might have been replaced, especially after having done it myself, I feel the risk is higher with second-hand items.
This repair cost a total of 239.86 yuan and took 4 hours. Compared to the parts cost, the labor would have been higher. Doing it myself was purely for fun, and having never disassembled a phone before, I was pleasantly surprised to successfully repair it and make it functional on my first attempt!